This guide will teach you how to set up your T30/T10.
This process typically takes 2-3 hours.
After setup you can begin flight operations.
We recommend that you practice flying manually with an empty tank and full tank for at least an hour before conducting any automated flight.
See Document 7 for the first flight guide.
Unboxing/ What's in the box
Standard Drone Kit Purchased Includes
- Drone Box
- T30 Drone
- Controller Case
- Controller
- External Controller Battery
- Controller, Controller battery charging station
- Power cable for charging station
- Controller Neck Strap
- Controller RTK Dongle
- White Sim card Dongle
- Extra Screws and tools
- T30 User Manual
- Field Operations Kit
- Nozzle buckles, nozzles, nozzle gaskets (you must use three gaskets to get proper thickness needed), controller external battery, 240V plug, bluetooth headset, 2 sets of CW propellers, 2 sets of CCW propellers, pass through fill port (if purchased),
- For more info click here
- Drone Battery Charging Station
- You will receive one station (unless additional is purchased)
- You will receive two power cables for the charging station
- Drone Batteries
- 3 batteries (unless additional is purchased)
- T30 Spreading System
DJI Account Activation Process
Create Account
- On computer, go to: https://agms-us.dji.com/
- Click “Create Your DJI Account” and follow steps to create your account
- Authenticate your account
- Click on your account in the top right corner of the screen
- Click “Profile”
- Click “Authenticate” in green lettering
- Type your name and click submit. Then Refresh your web browser
Charger Controller and external batteries
- Controller INTERNAL battery level must be 50% or higher to be able to install firmware updates during initial set up.
- Use the small wall charger (black box) and USB cord to charge the controller internal battery. Plug for the controller is on the lower left side.
Controller Setup
- Install External battery into the back of the controller
- Insert White Sim Card Dongle
- IF YOU DON'T DO THIS THE SETUP PROCESS WILL NOT WORK
- Power on Controller

- You are now beginning initial setup of the controller
- Select desired language preference
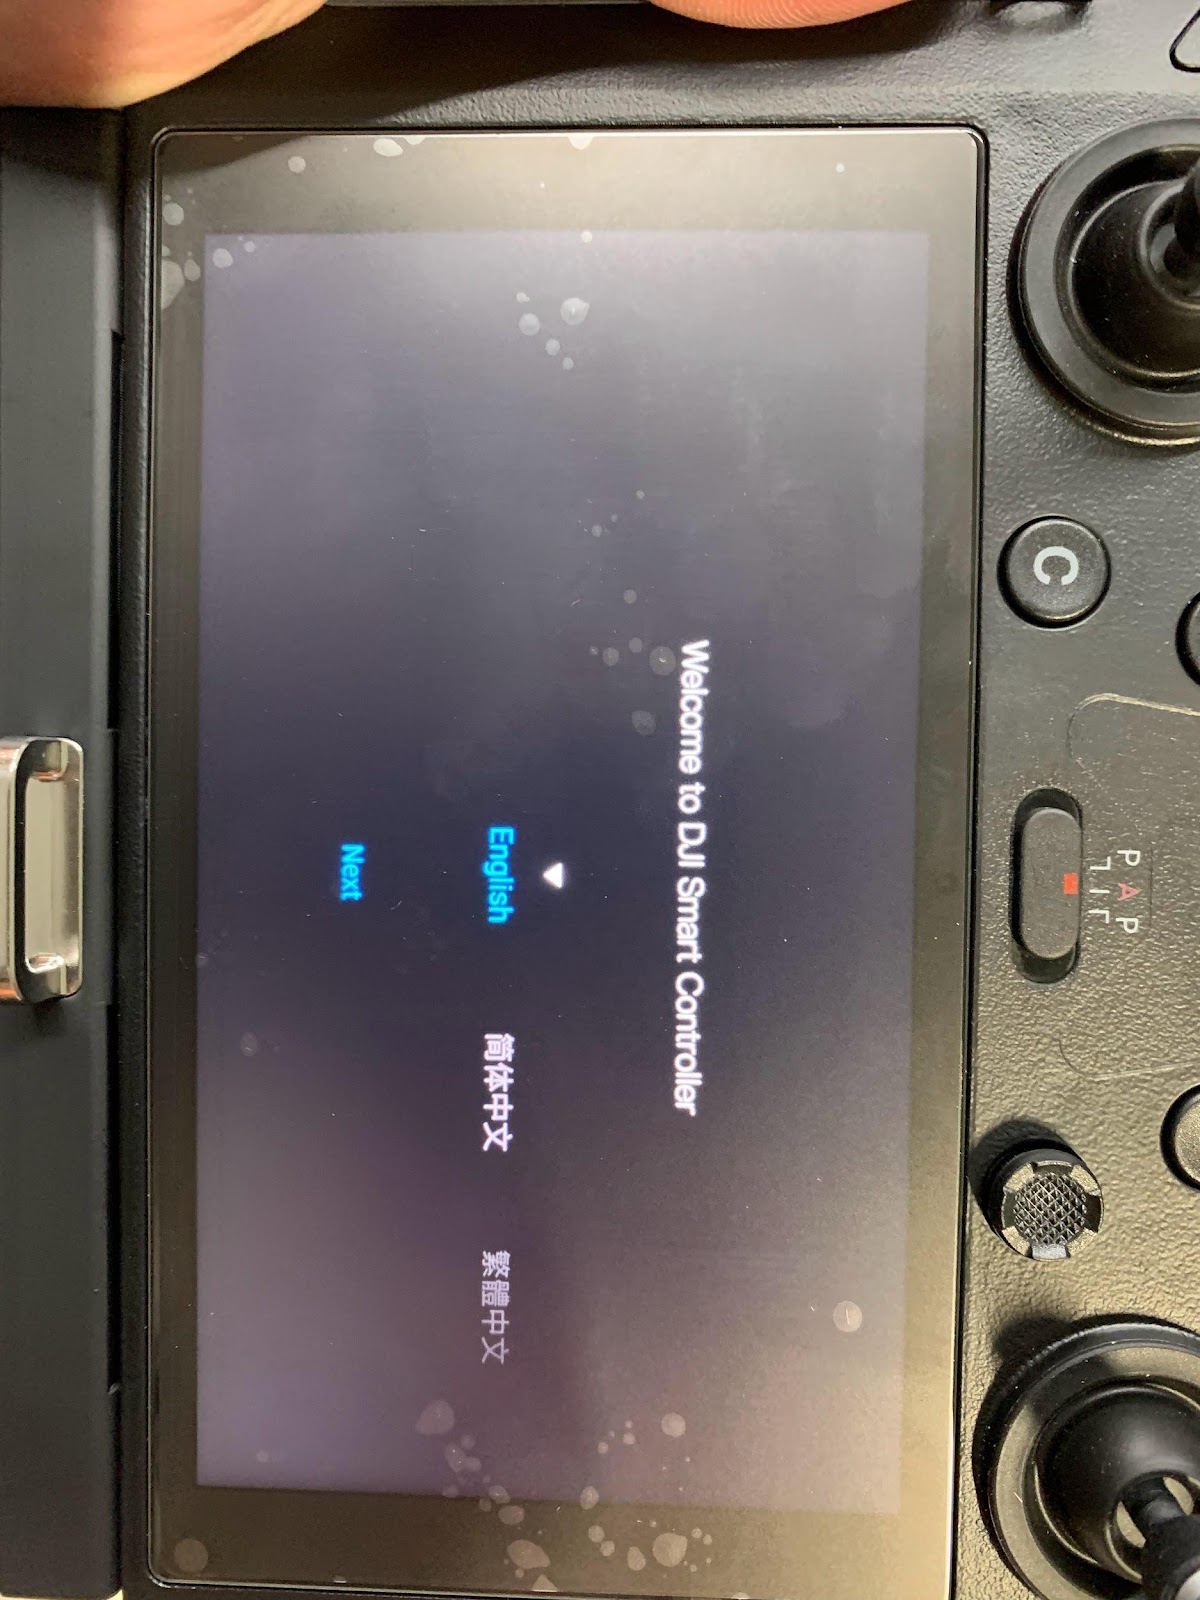
- Agree to DJI Terms of Use and Privacy Policy
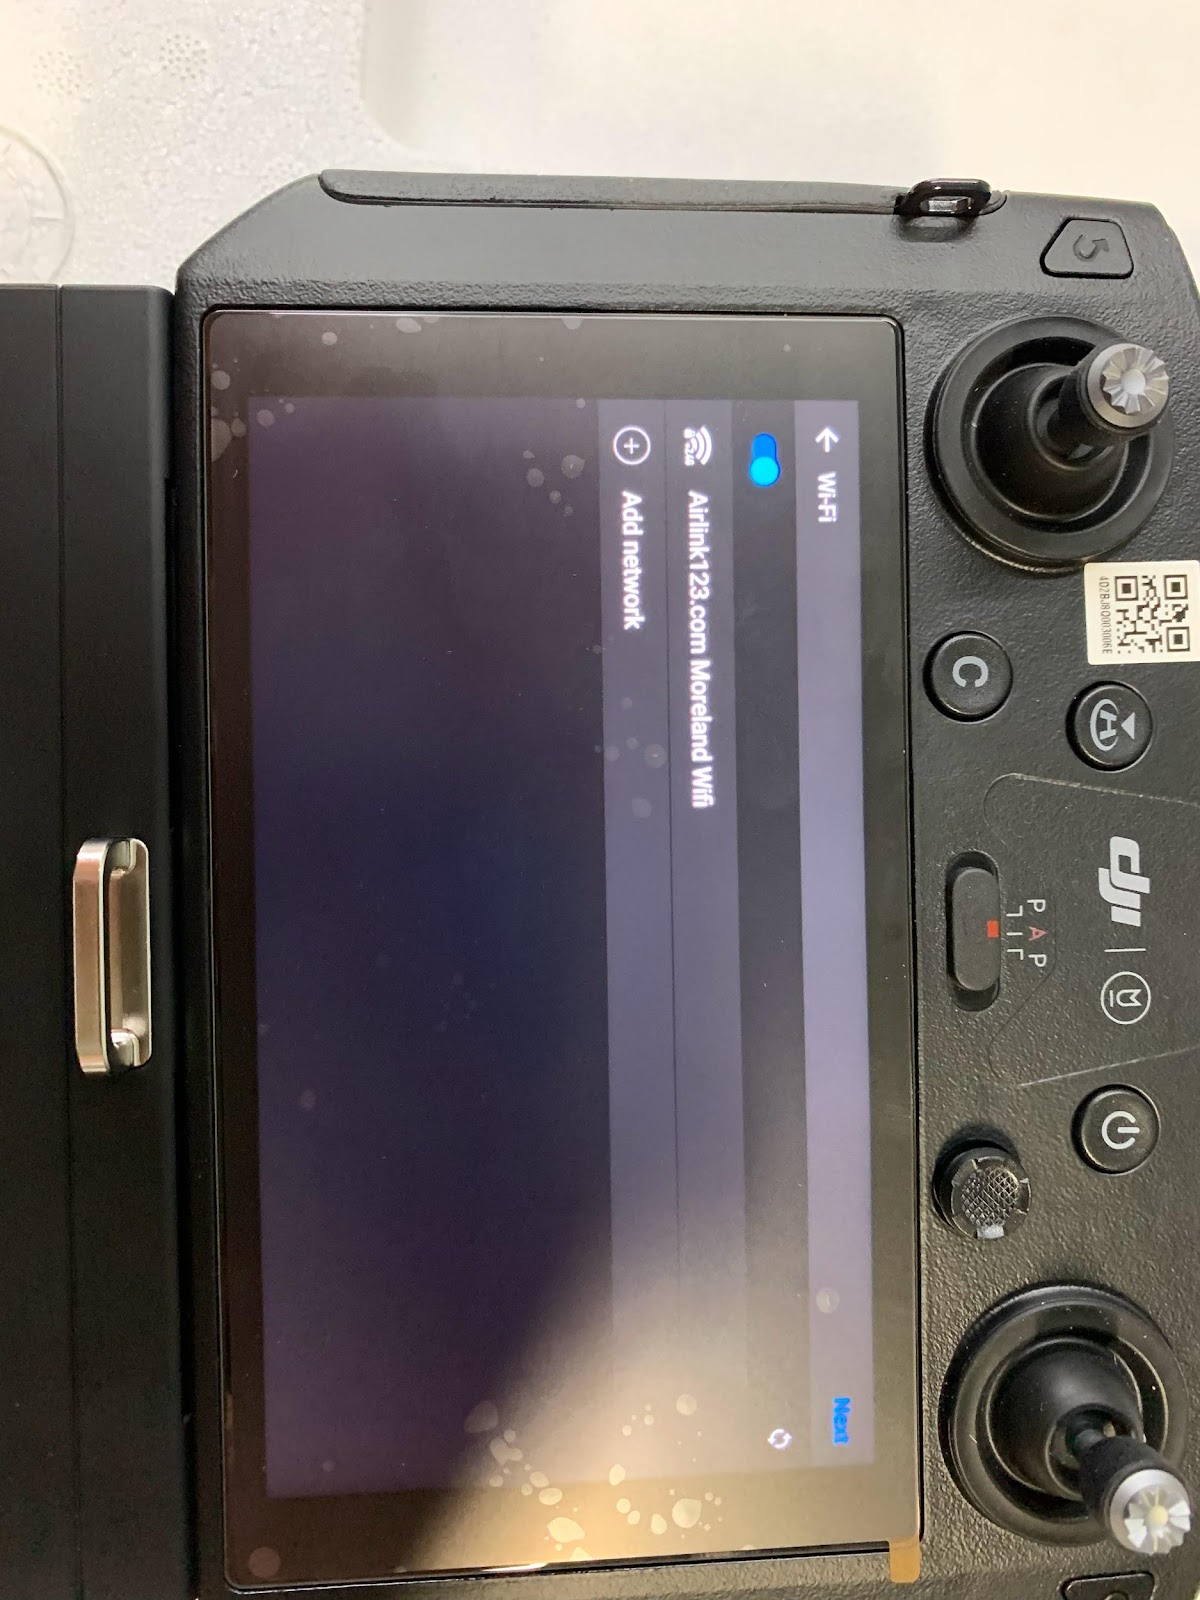
- Enable Wifi
- Allow controller to find your wifi
- Select and enter your wifi credentials
- Select your desired Time Zone, then click “ok” in bottom right corner
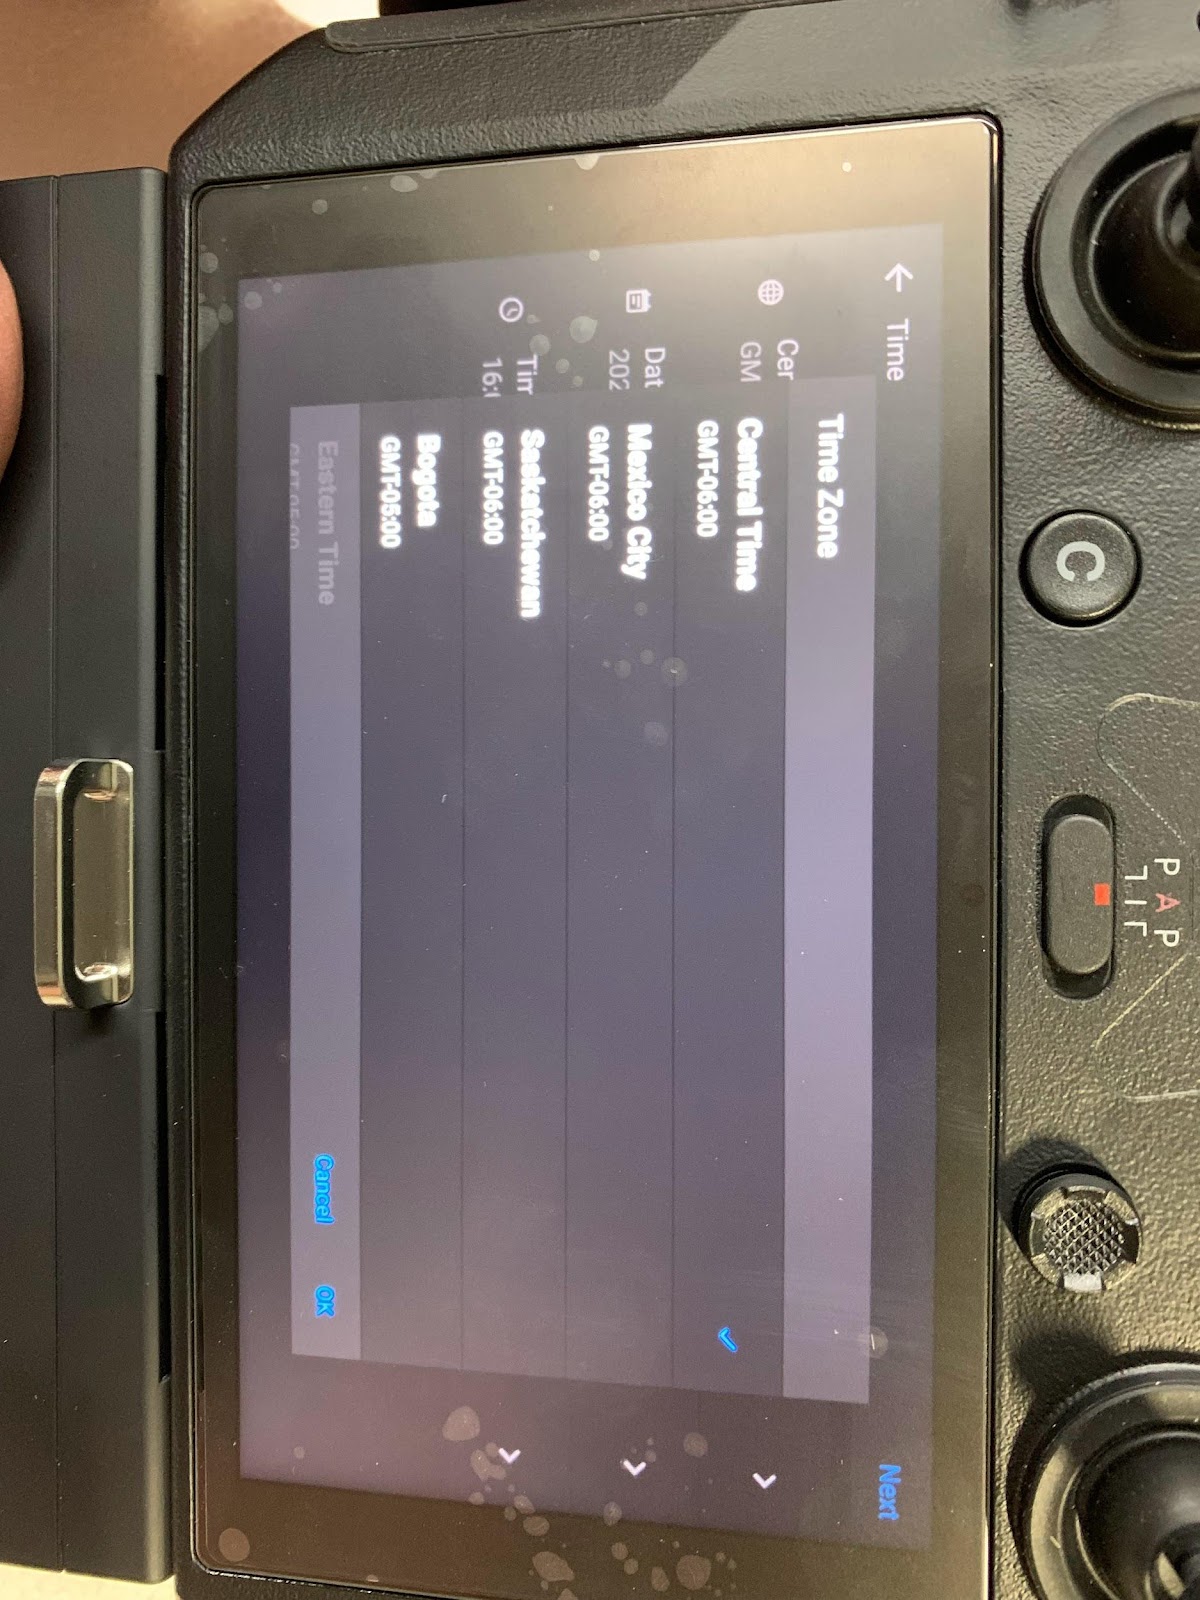
- After selecting “ok” agree to the Note pop up by selecting “Confirm”
- Once selected, ensure date and time are correct
- Log in with your dji account
- Use your same email and password that you used to create your DJI account on your computer.
- Select “Activate” to activate your controller

- Joining the Product Improvement Plan
- We select “Not Now”
- If you would like to join, please select the link and read for more information.

- Select a Home App
- Select “DJI Agras”
- Then select “Always”

- Terms of Use
- Check box, stating you have read and agree to the terms of use
- Select “Agree”

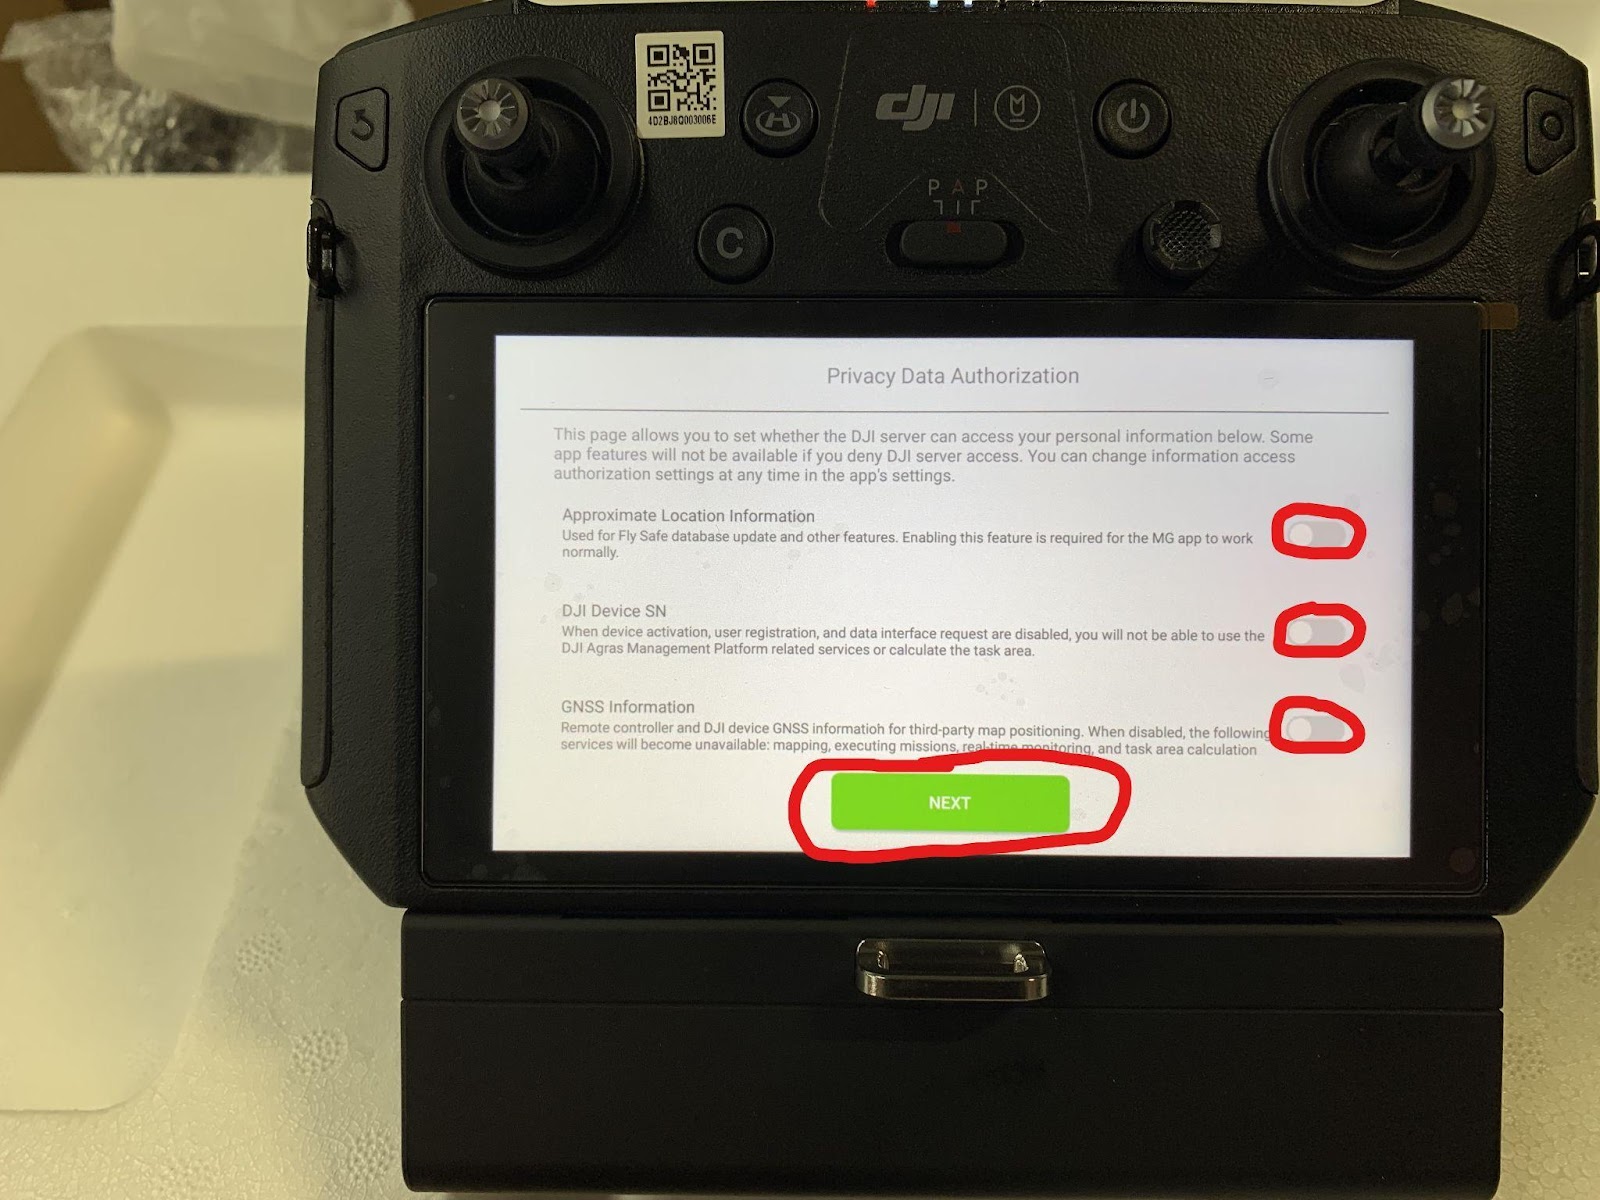
- Privacy Data Authorization
- You have to check all three on
- Then select “Next” at the bottom
- Joining the Product Improvement Plan
- We select “Not Now”
- If you would like to join, please select “Join User Improvement Plan”
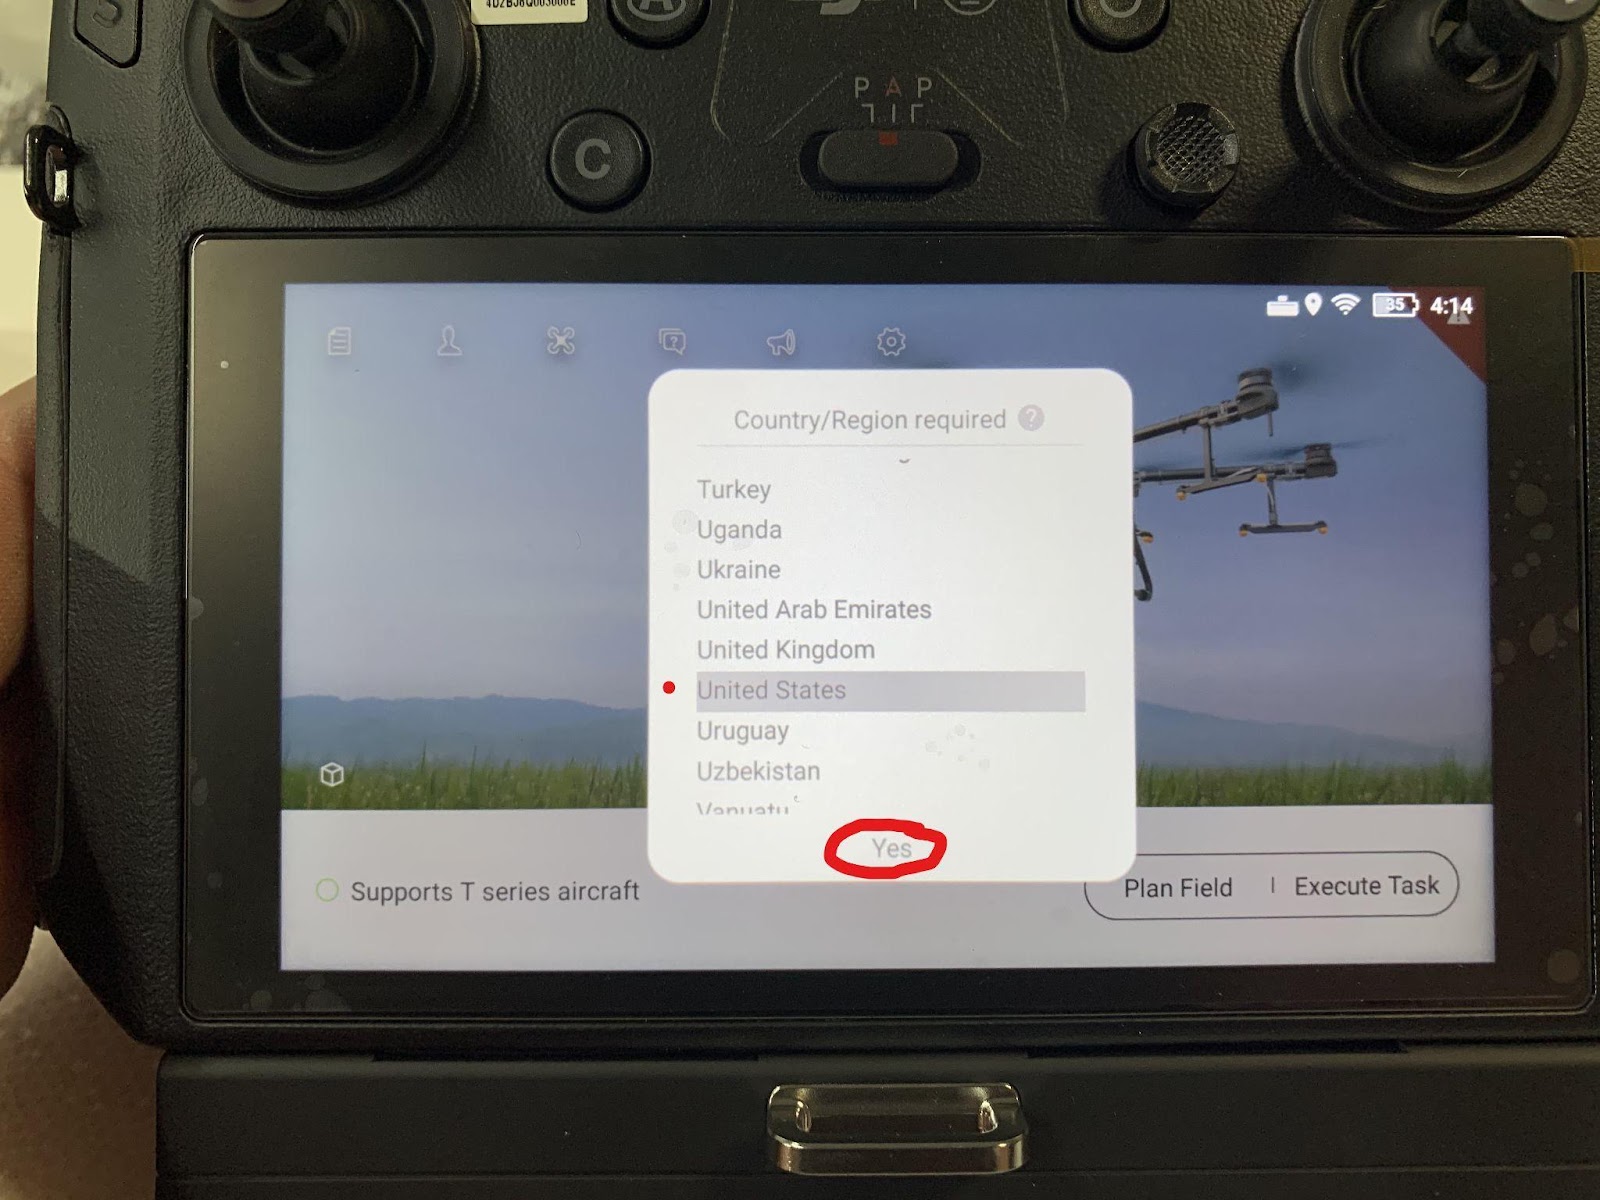
- Country/Region Selection
- Select desired country
- Then select “Yes”
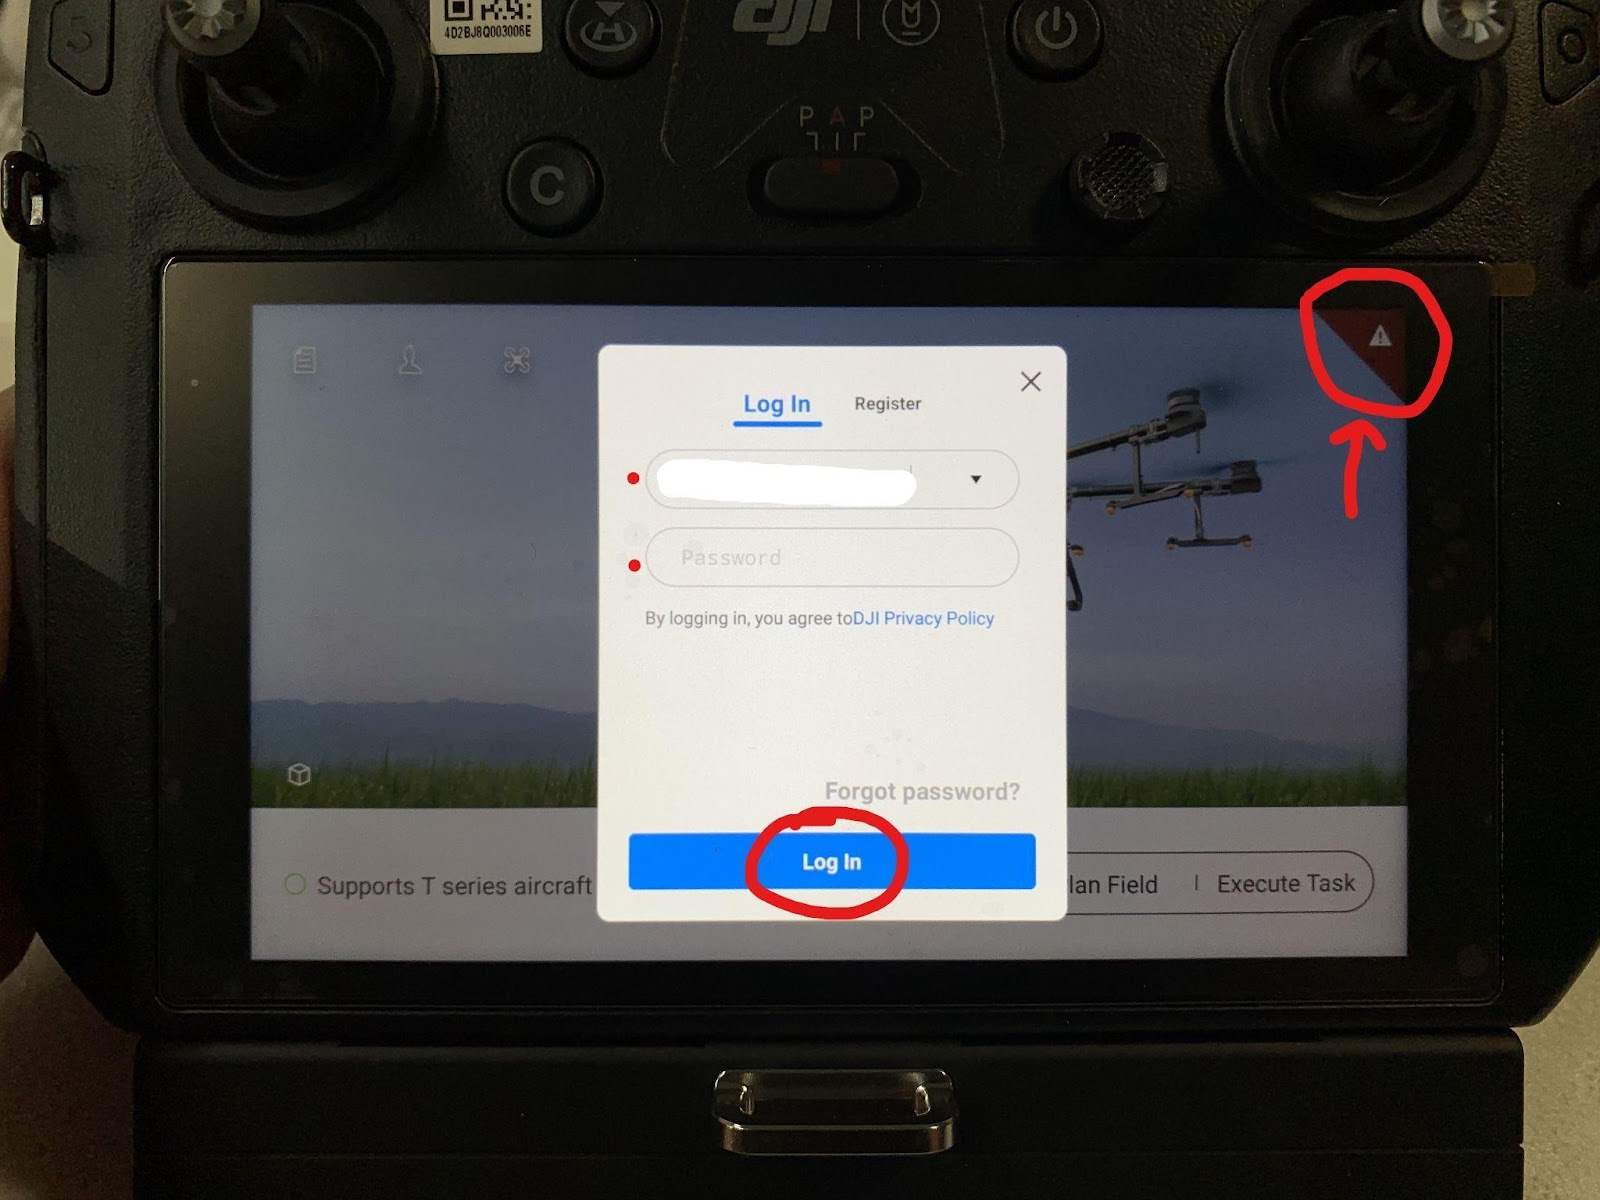
- Logging into DJI account on controller
- Click in upper right corner on red area
- Select “Log In” on Error Message pop up
- Then log in with your DJI account credentials
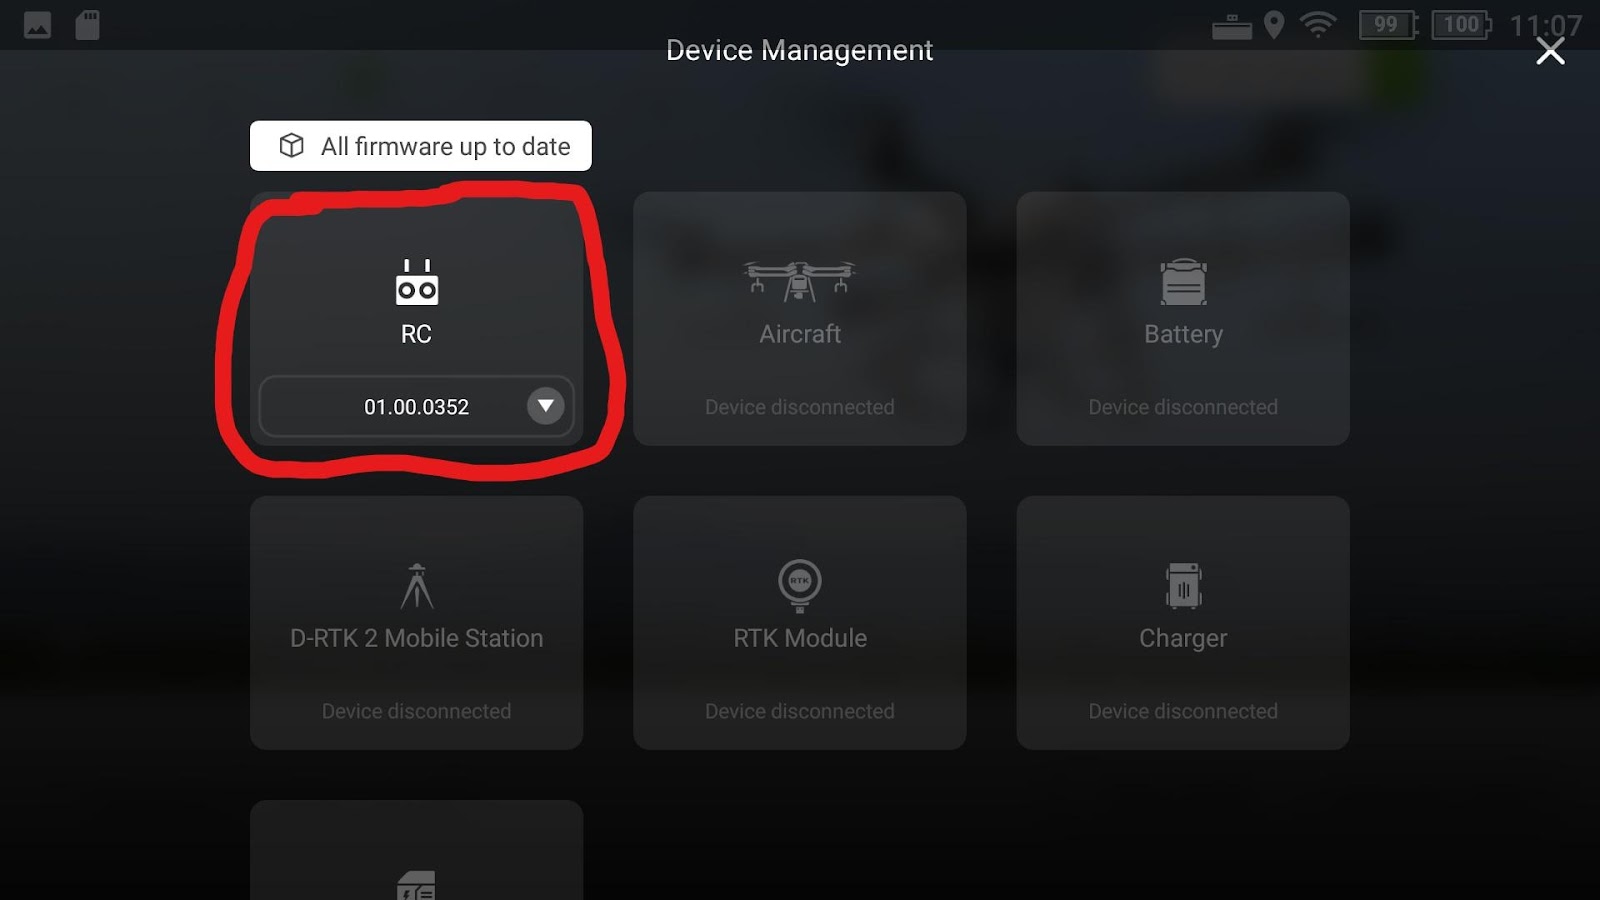
- Controller Firmware Update
- Click on Device Management Icon on top of screen
- Controller should be selected automatically
- If not, click the drop down arrow and click “Select” on the newest firmware version.
- Select “Update” on bottom of screen
- Allow the controller to update, it can take a while but usually less than 15 minutes.

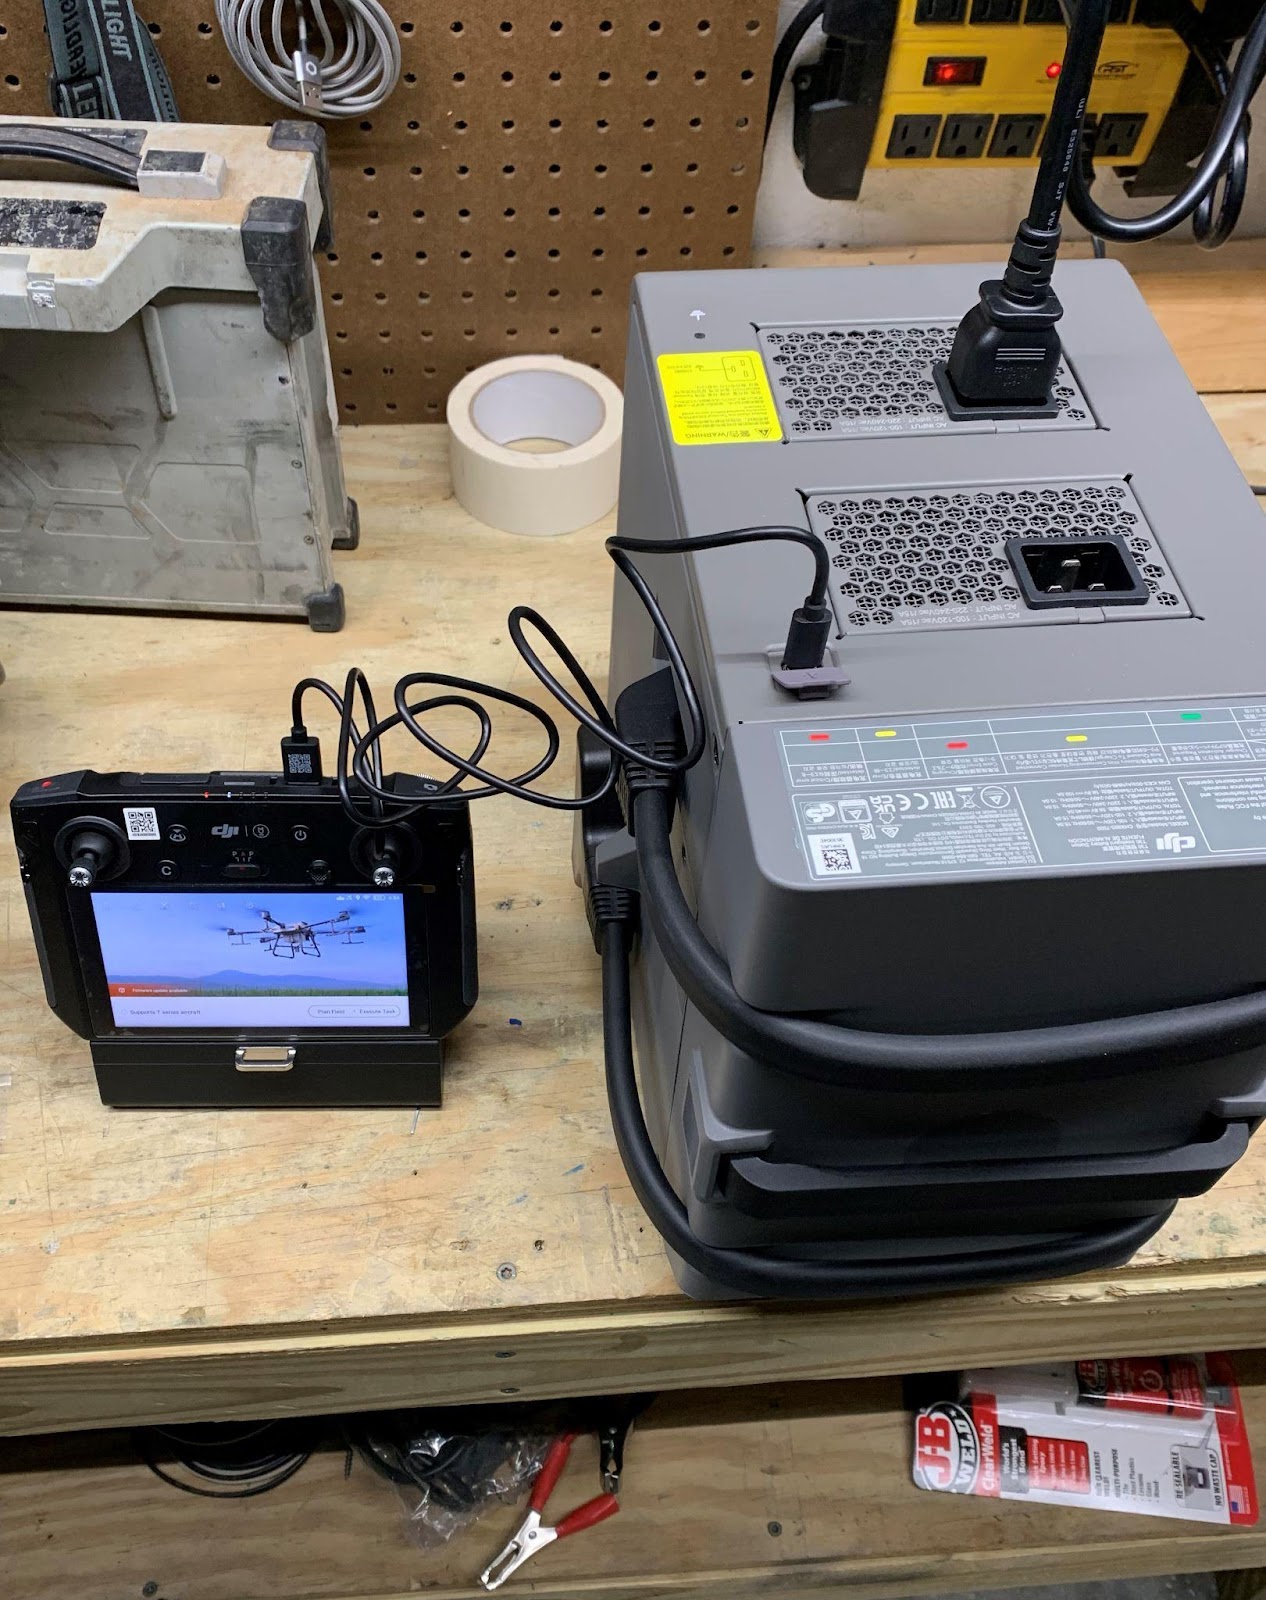
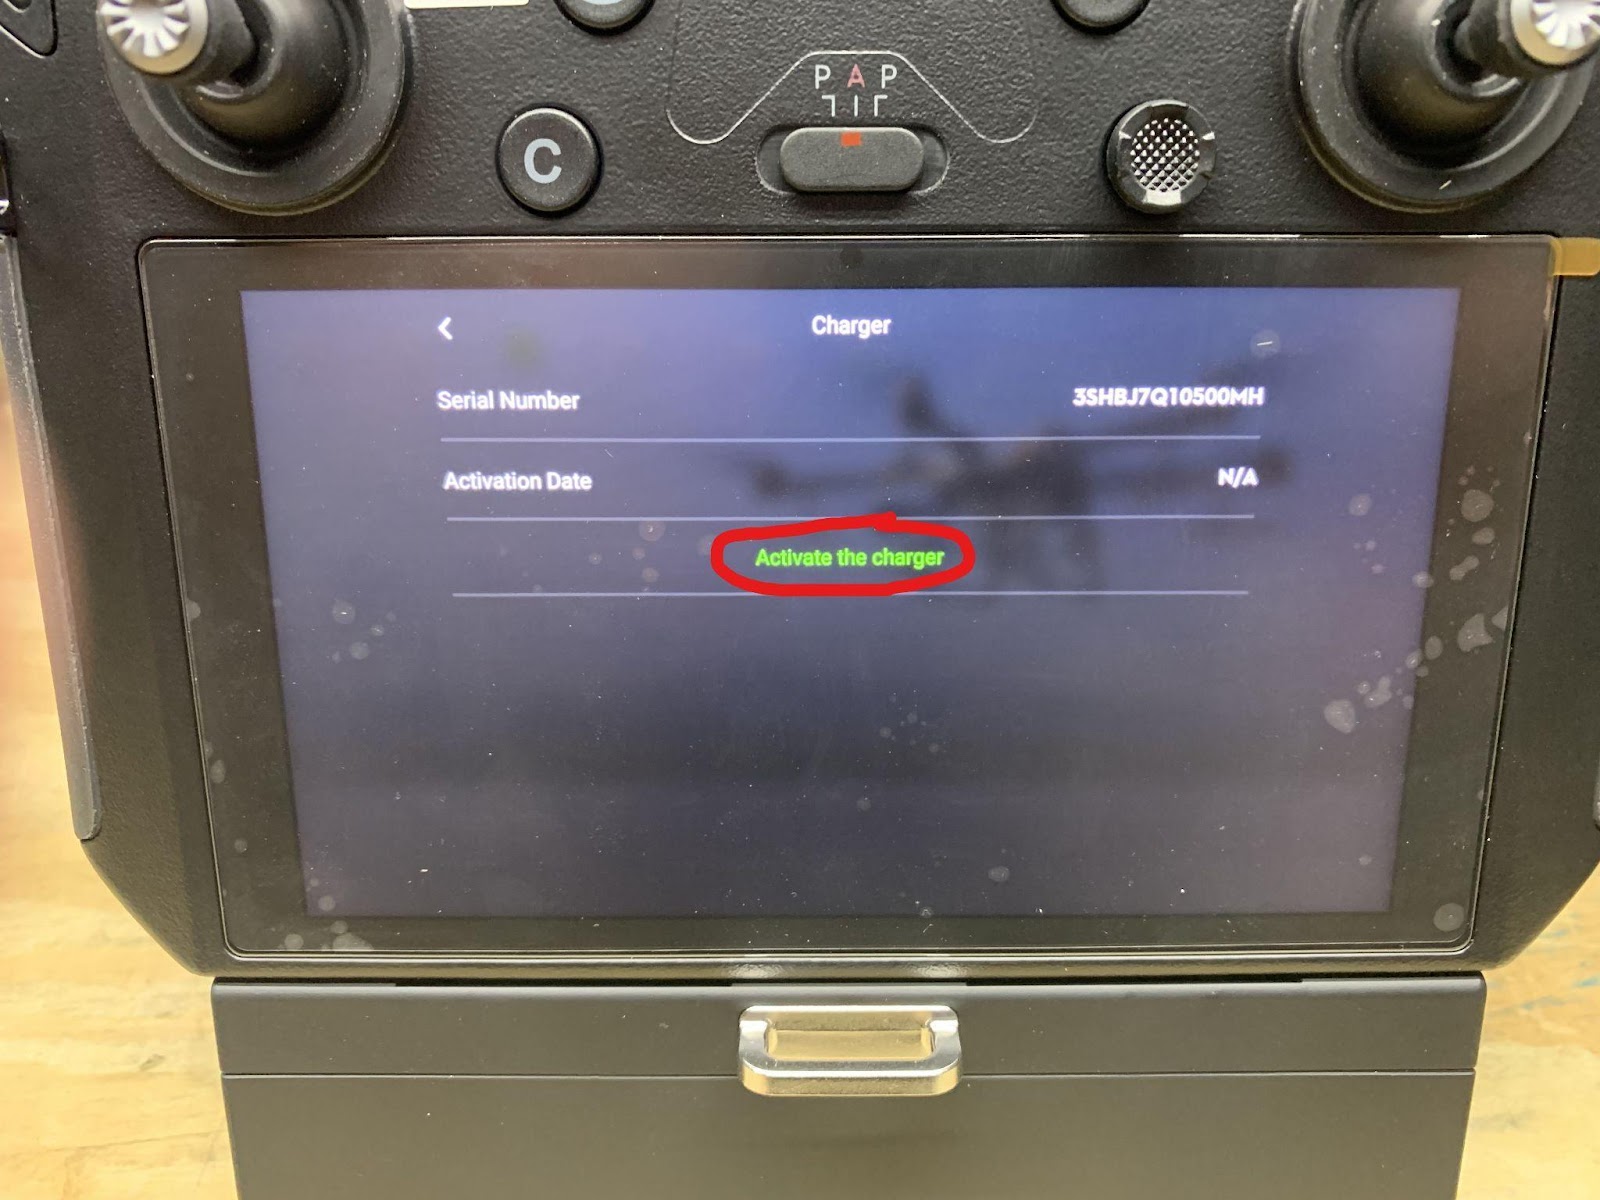
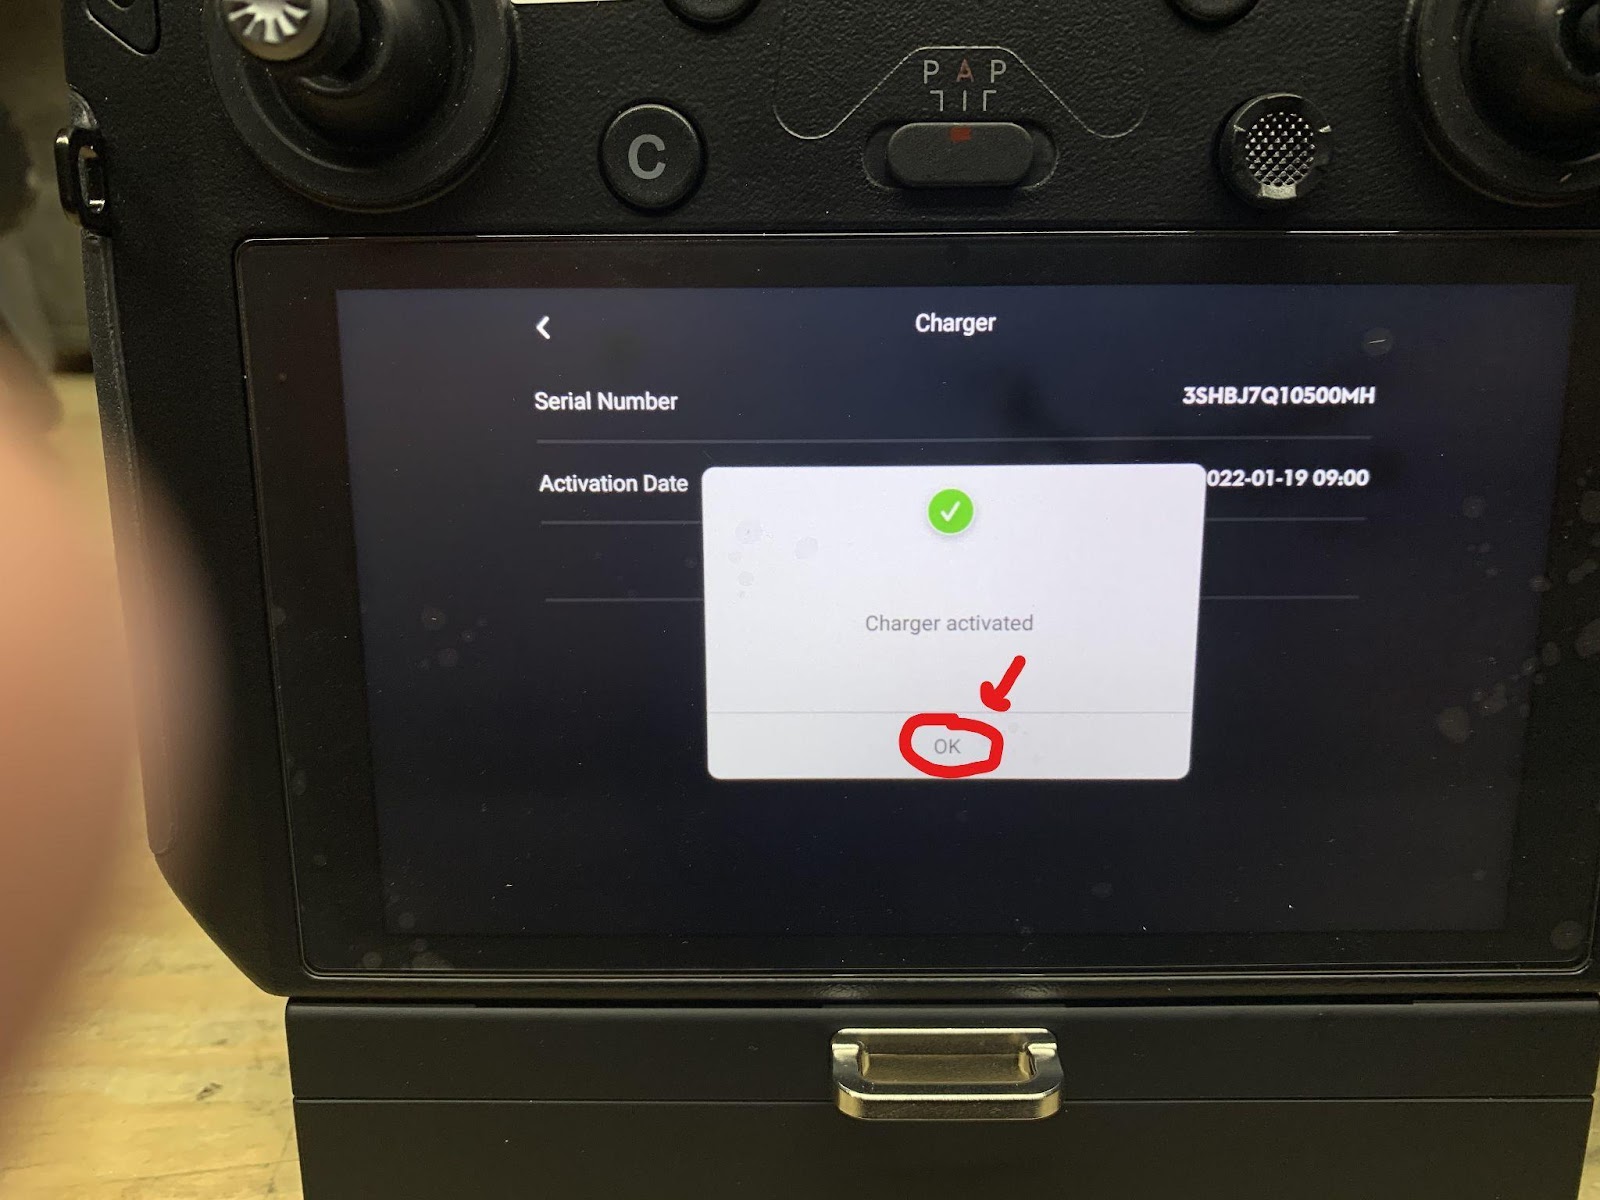
Activating Charging Station
- You will need your charging station
- 1 power cable
- USB cable that came with controller
- Plug in charger
- Plug in USB into back of charger
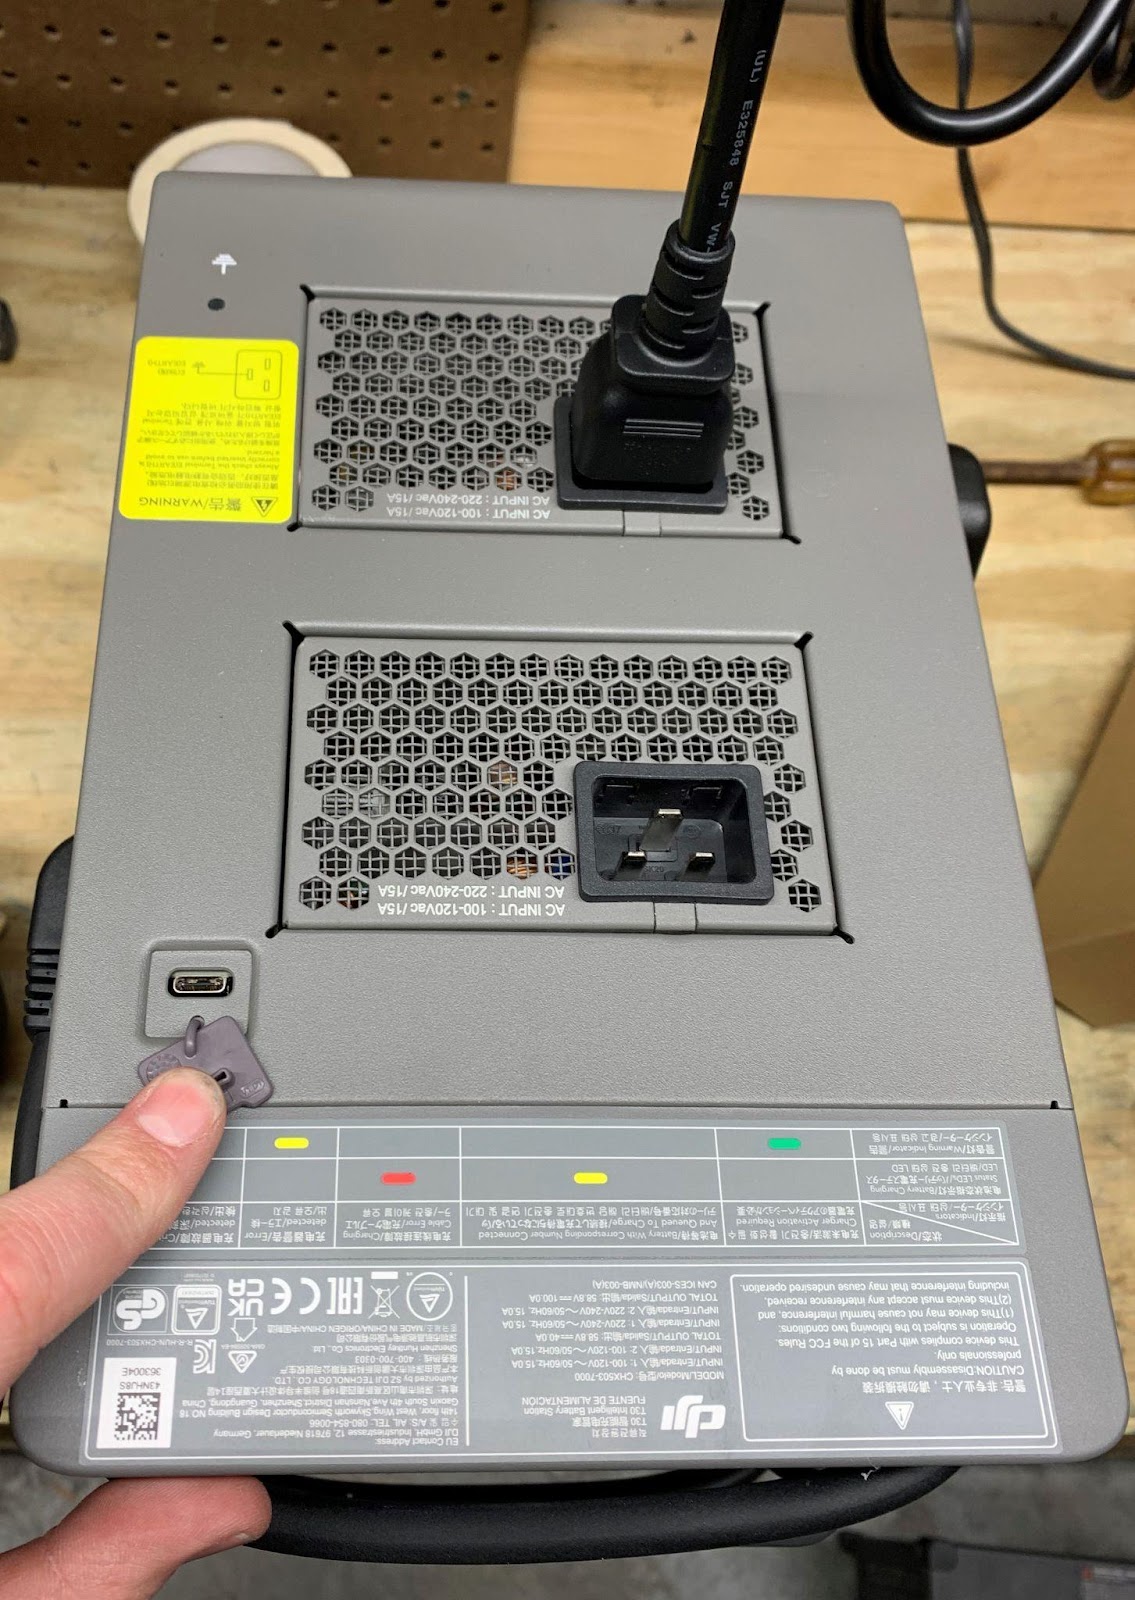
- Power on charger

- Connect USB to controller
- Under Device Management (looks like a drone on main screen), select charger
- Activate

Slow Charge your Drone batteries the first 3 times.
- Plug in one cord from a 110V wall outlet to either of the ports on the charger.
- This will slowly charge your batteries.
- Power on the charger and plug in two batteries on both cords.
- Only one battery will charge at a time. When full, the other battery will begin to charge.
Drone Activation
- Install a battery into the drone
- Power on the drone by pressing, then pressing and holding the power button on the battery until all 4 led lights are light.
- Allow drone to fully boot up, usually 20-30 seconds
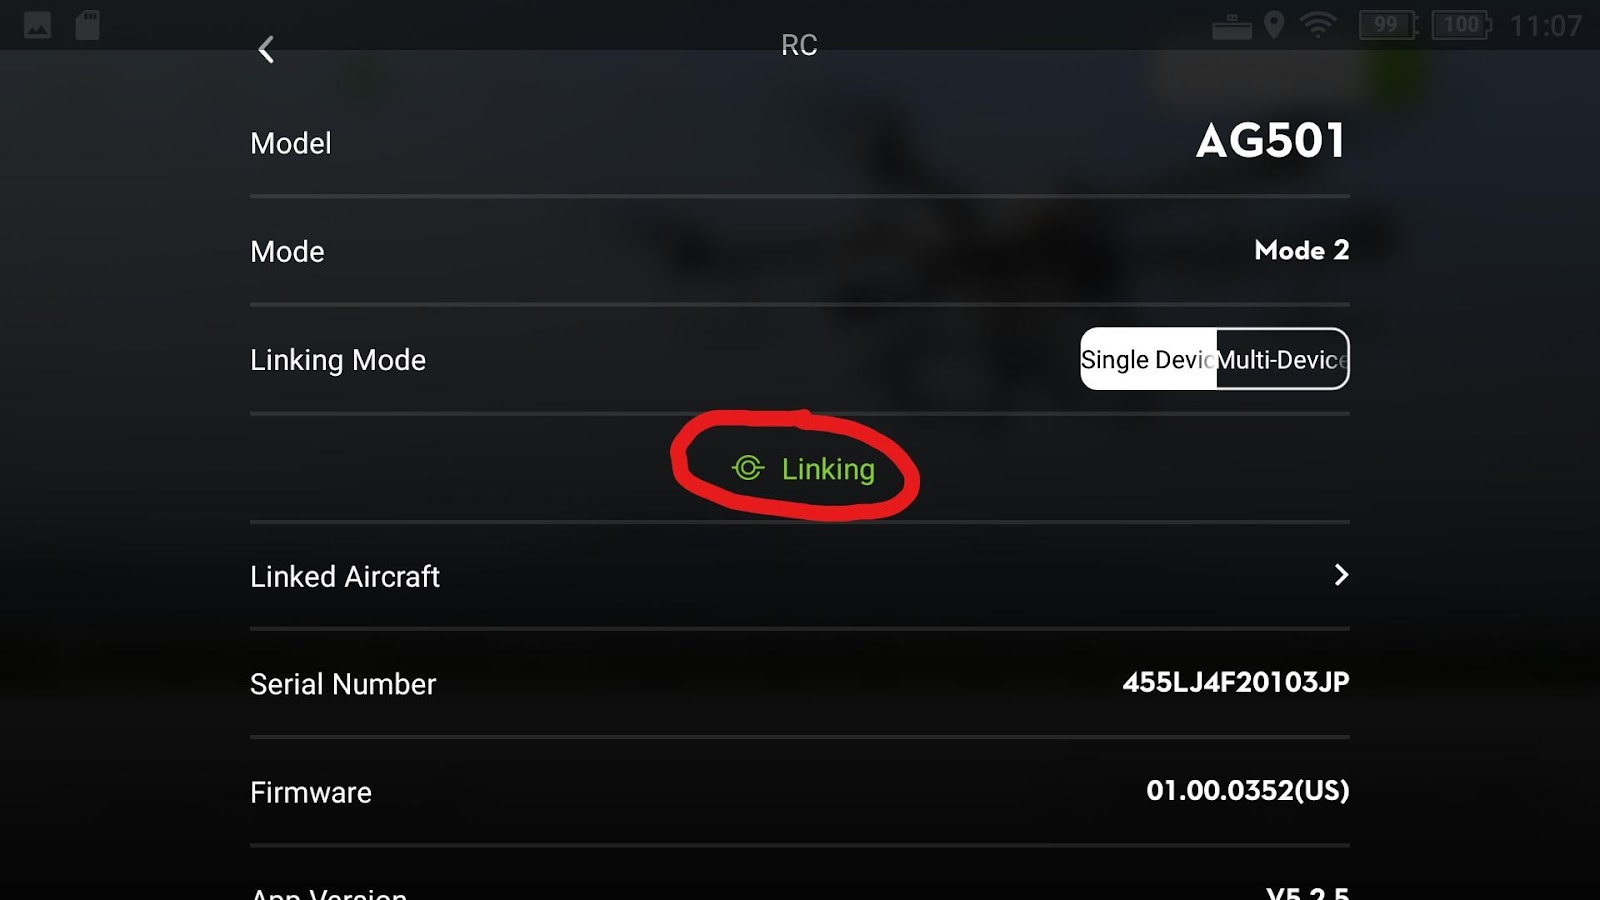
- Link your drone to the controller
- On your controller click device management icon
- Click on the RC tab
- Select “Linking”
- Controller will flash a blue light and begin to beep (if volume is on)
- Controller will flash a blue light and begin to beep (if volume is on)
- Select “Linking”
- On drone battery, press and hold button for 5 seconds
- Led will flash each light one by one indicating linking mode is activated.
- After a few seconds, the controller will stop beeping, the blue light will now be green, and the controller will vibrate.
- You are now linked to your drone.
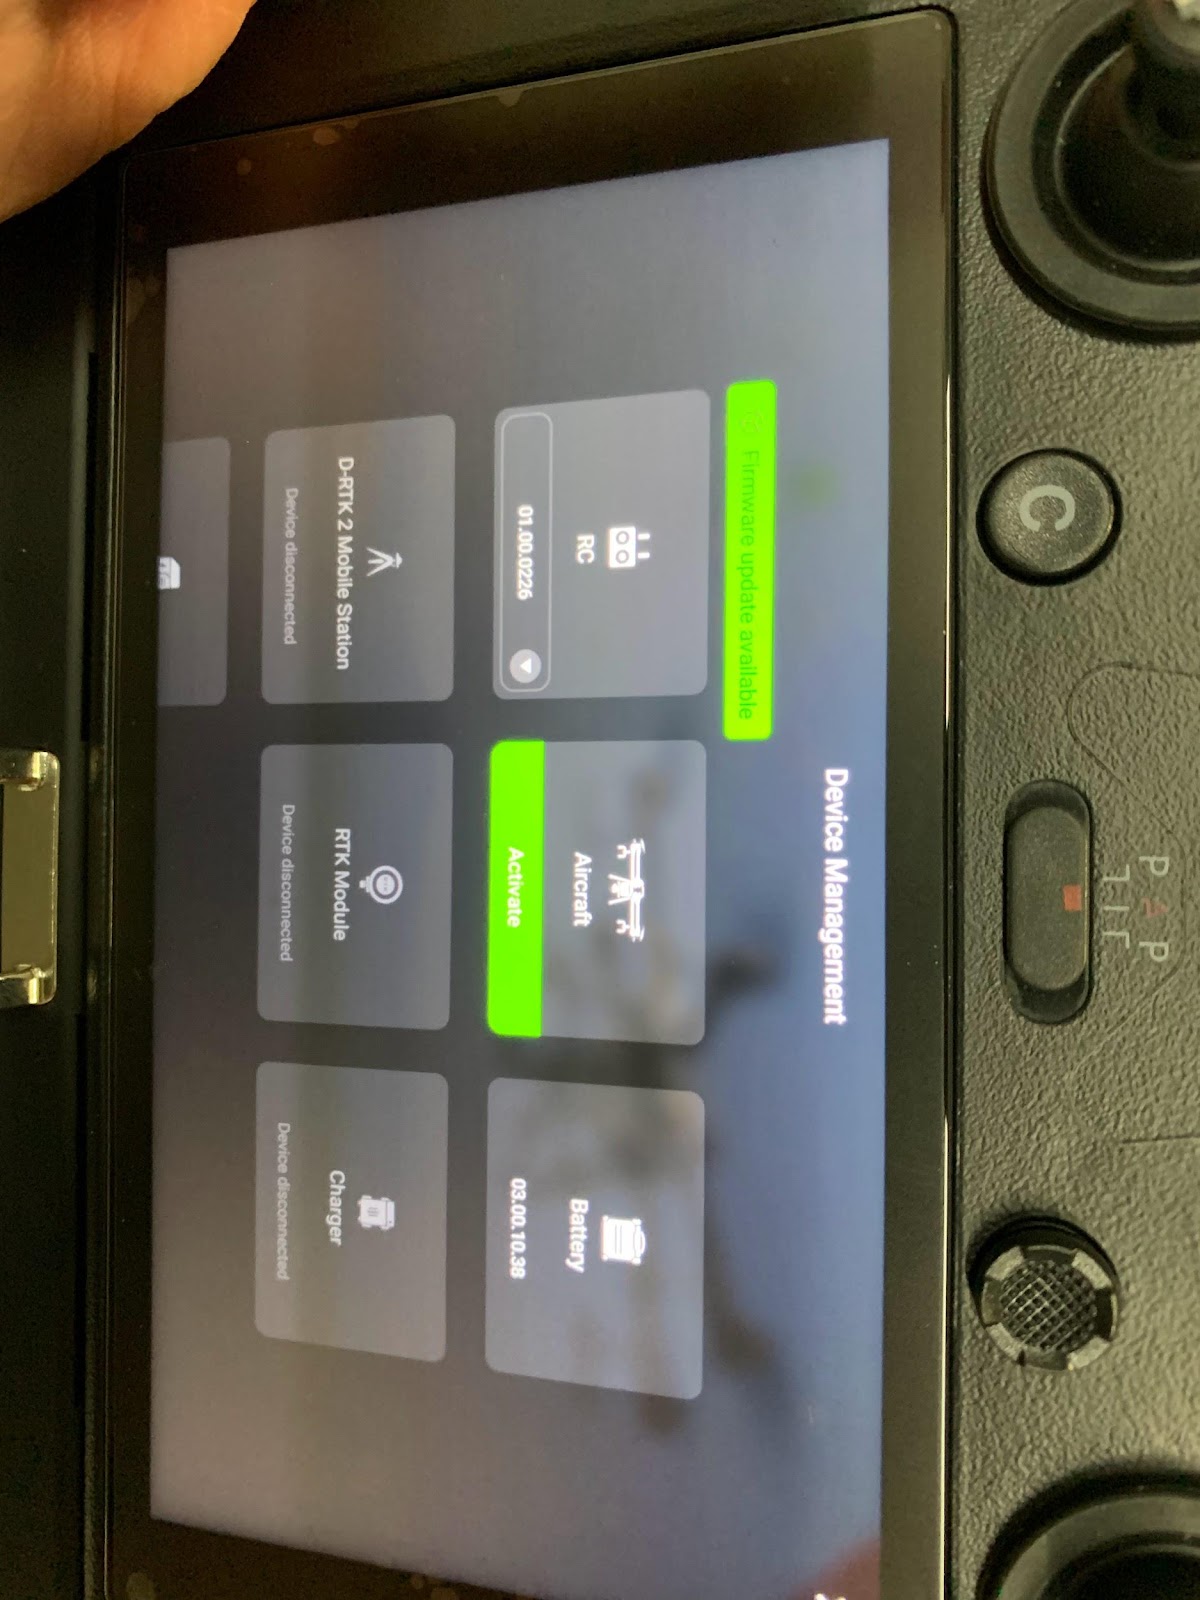
- Activating Your Drone
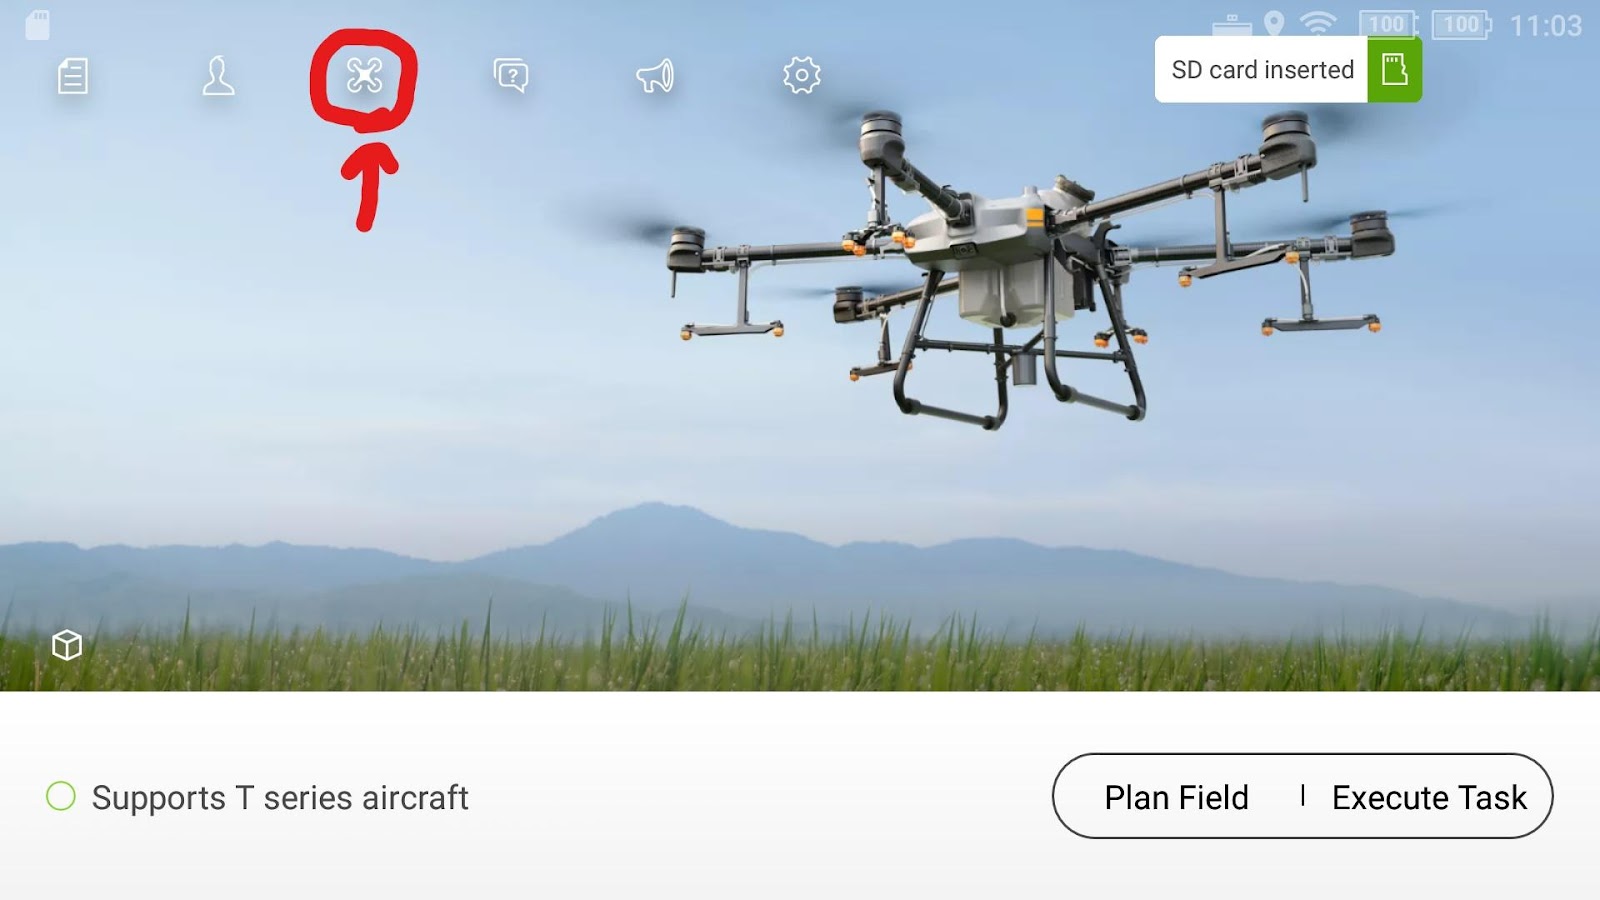
- Click device management icon
- Select Activate
- Select Activate
- DJI UAS Products Term of Use
- Scroll to bottom and check agree box
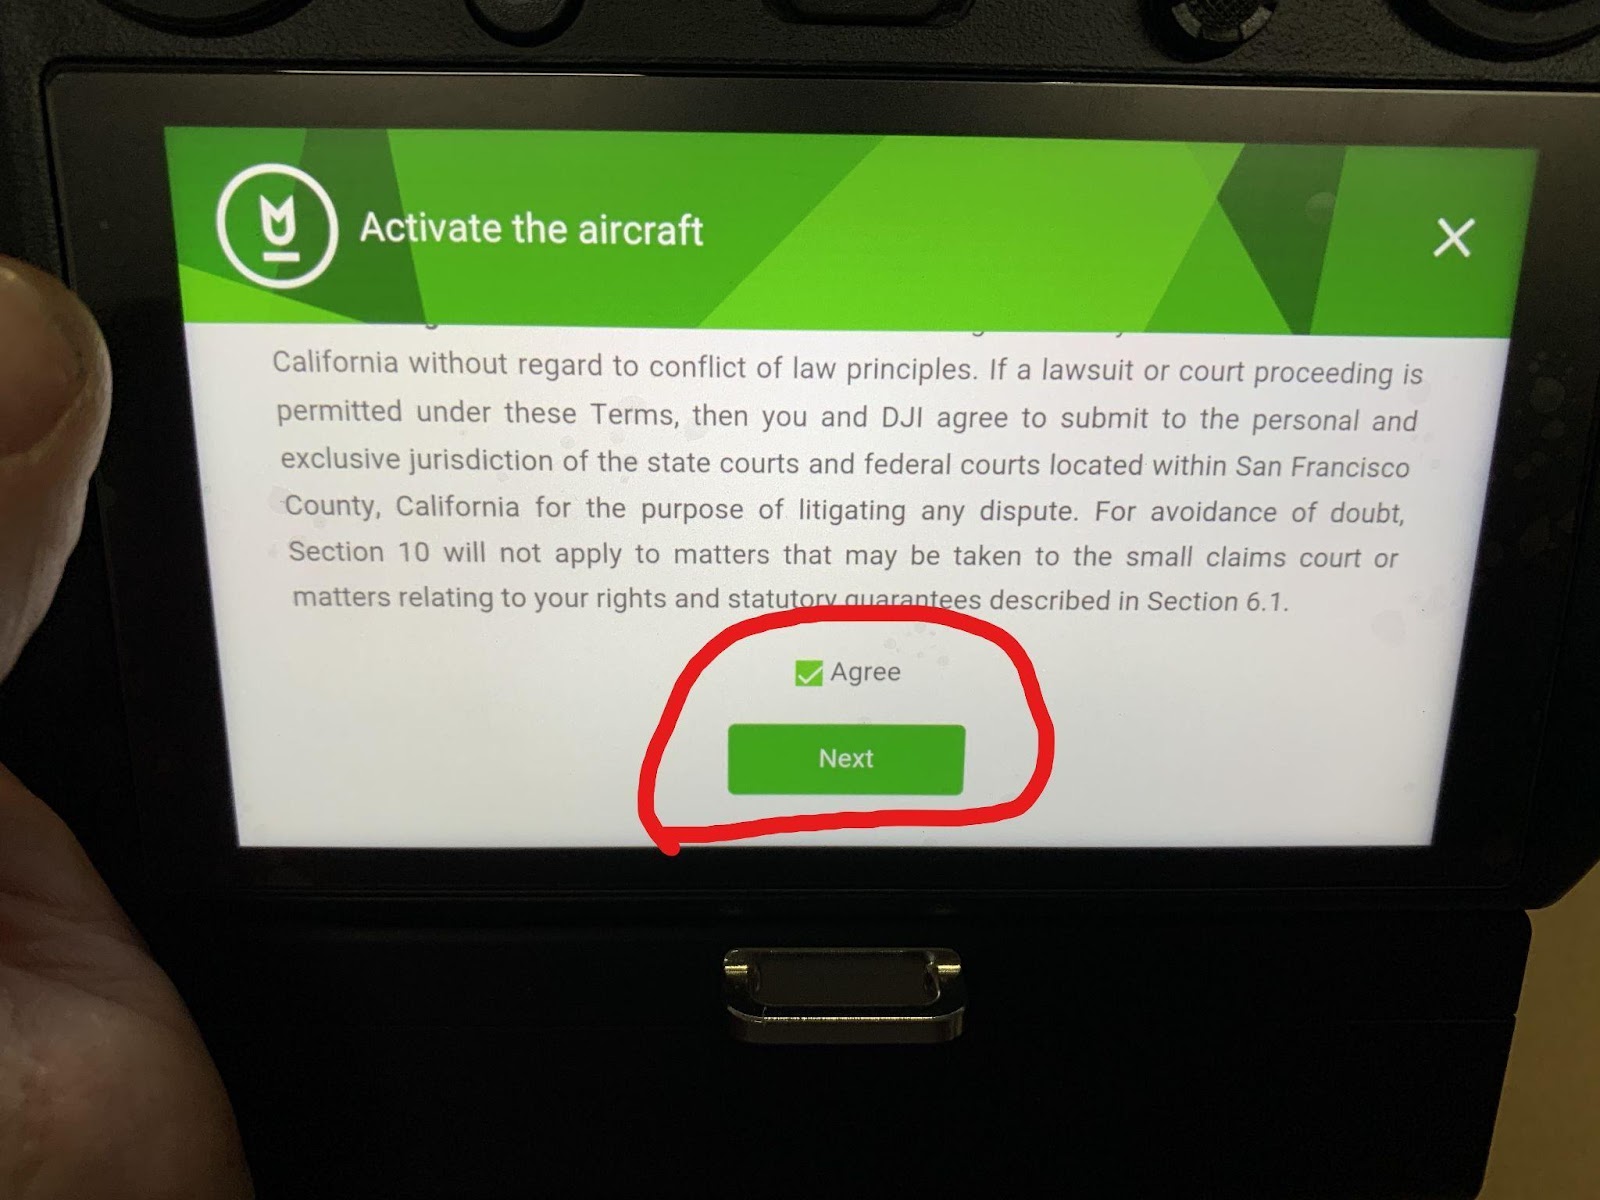
- Then select “Next”
- Privacy Policy
- Scroll to bottom and check agree box
- Then select “Next”
- Same as previous
- Personal Information
- Ensure information is correct
- Select “Next”
- Same as previous
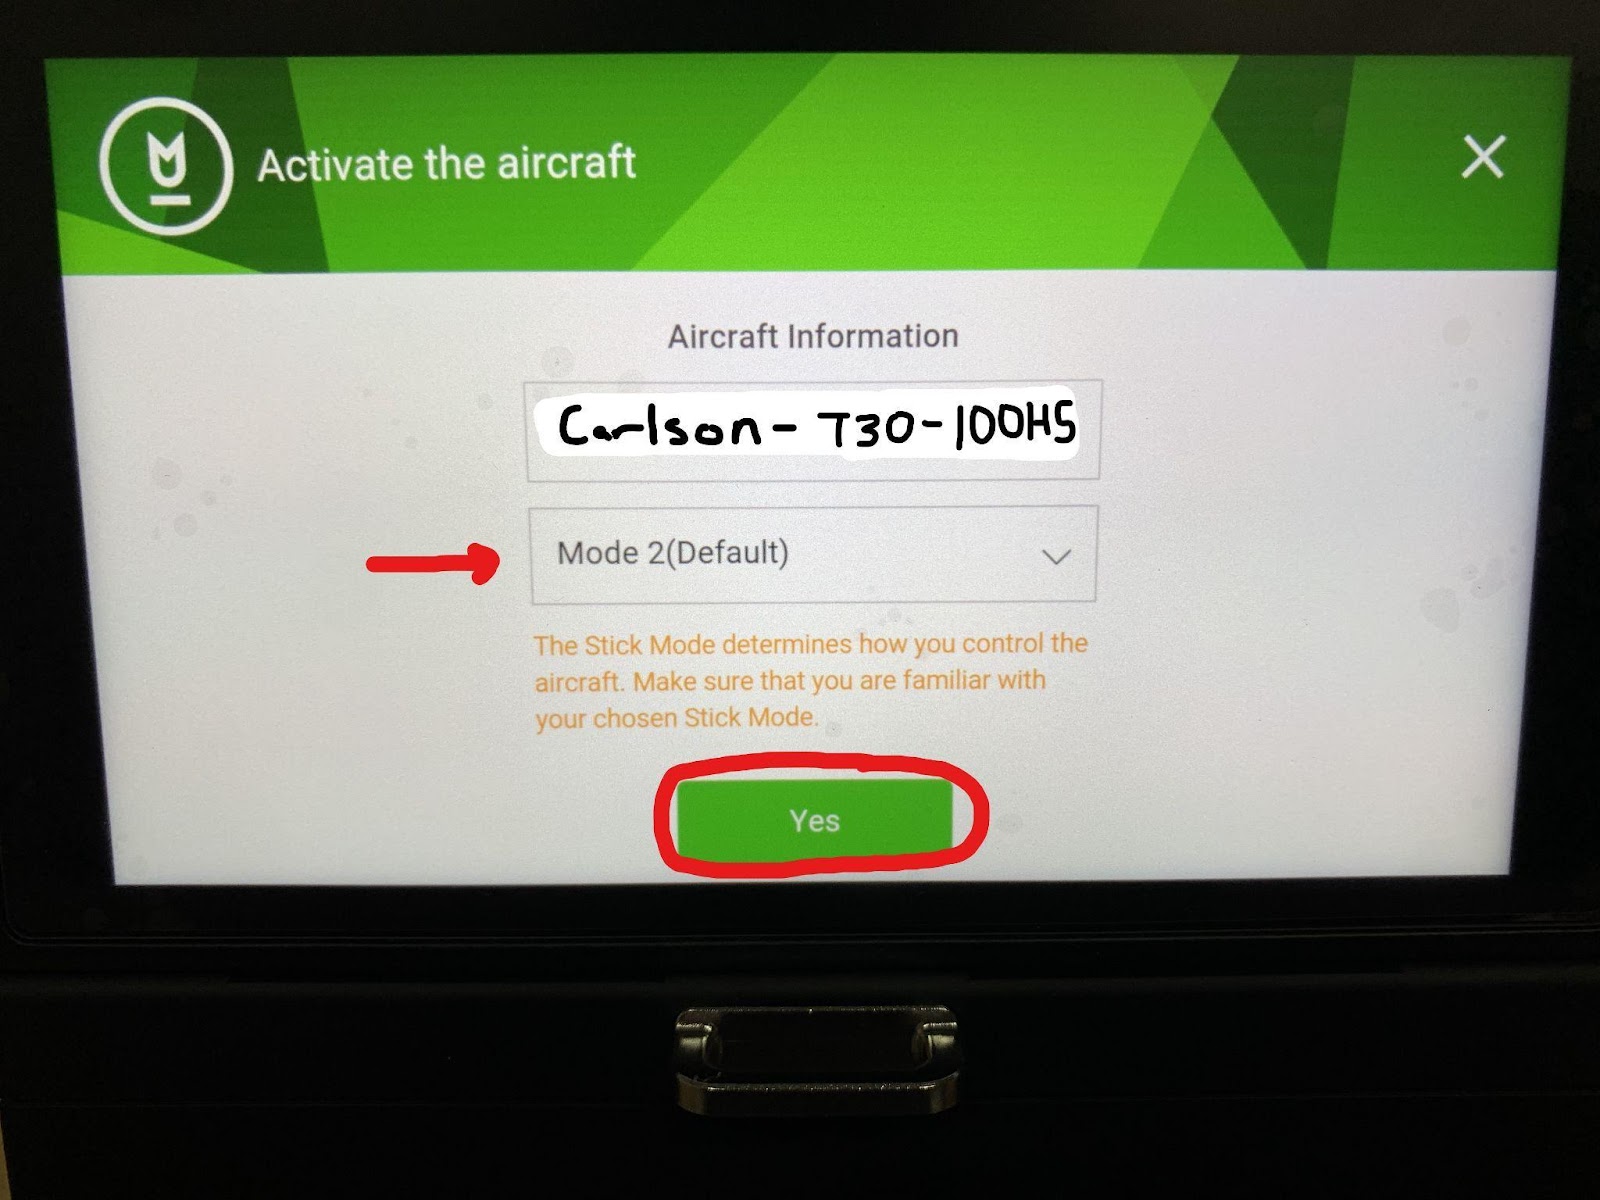
- Aircraft Information
- Enter Aircraft name
- We like to use owners last name followed by T30- last five numbers of drone serial number
- Example:
- Carlson T30-100H5
- Example:
- We like to use owners last name followed by T30- last five numbers of drone serial number
- Leave drone on “Mode 2”
- Then select “Yes”
- Enter Aircraft name
- Drone Has been Activated
- After 5 seconds motors will beep and move slightly
- This is normal
- A Log In Again pop up will show up
- Click “Confirm”
- After 5 seconds motors will beep and move slightly
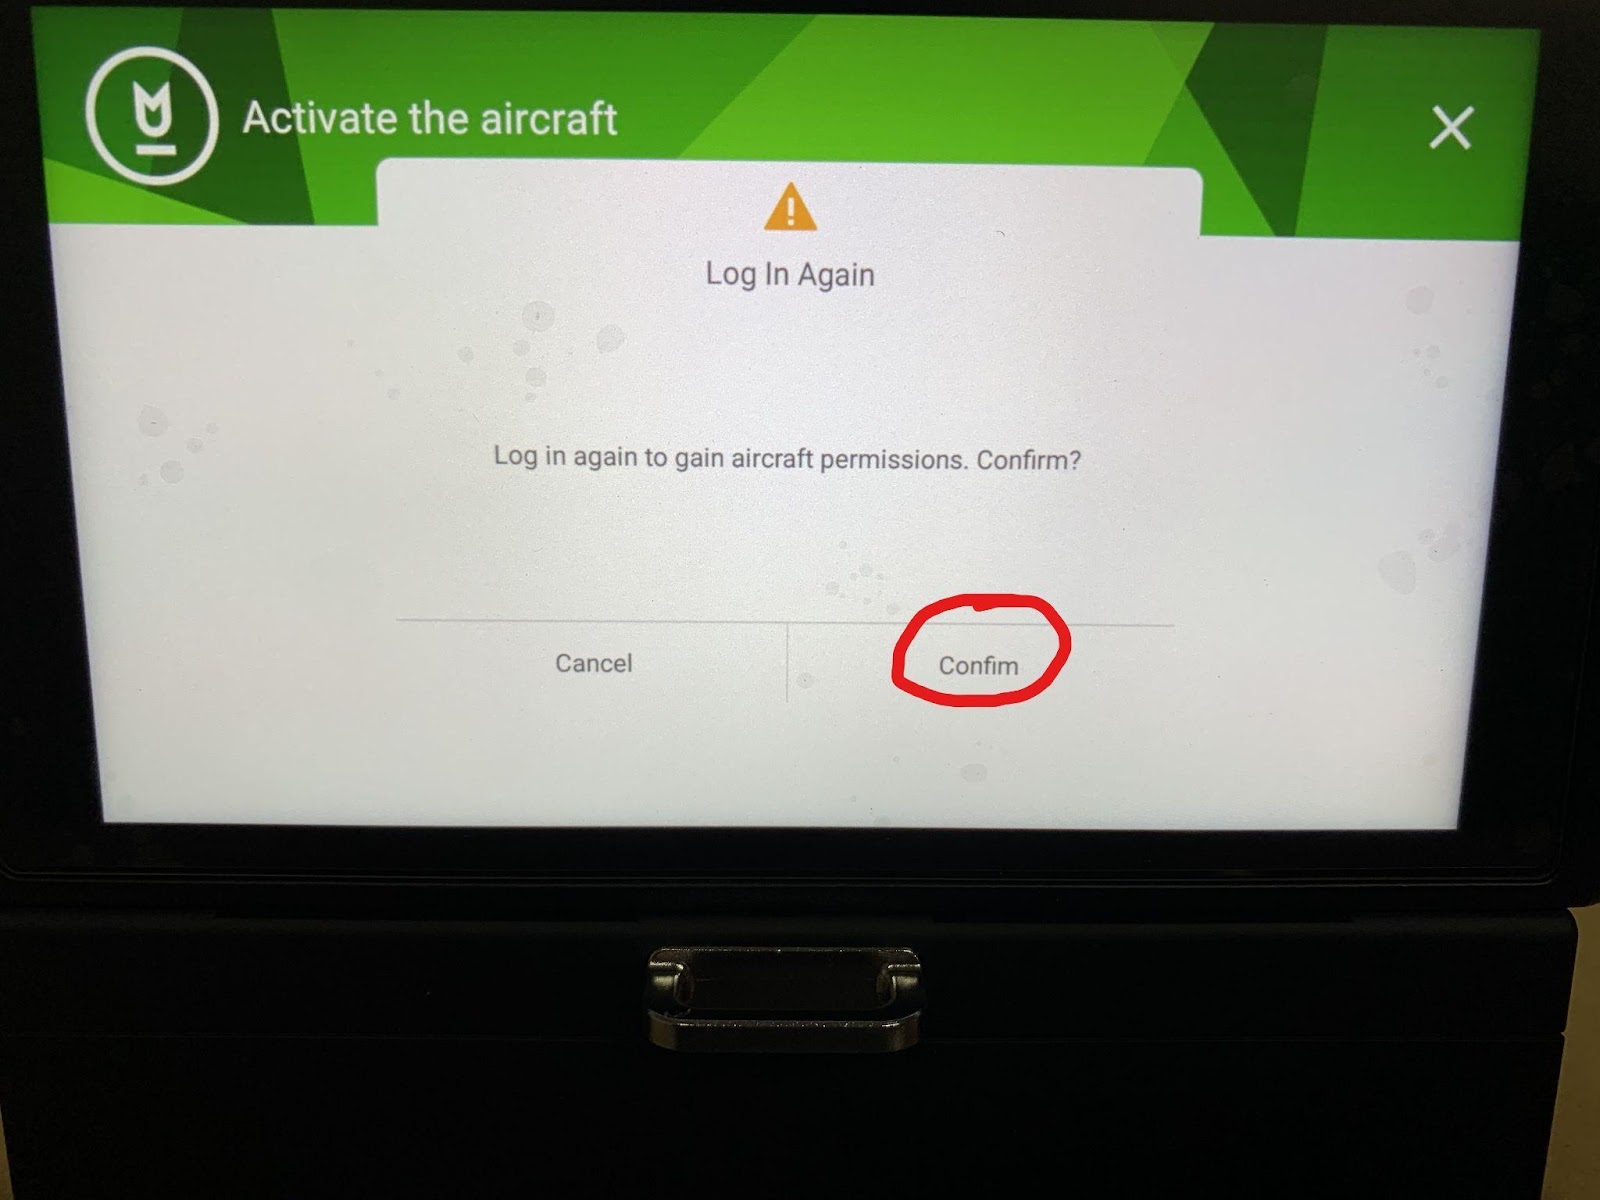
- Log in with your DJI credentials.
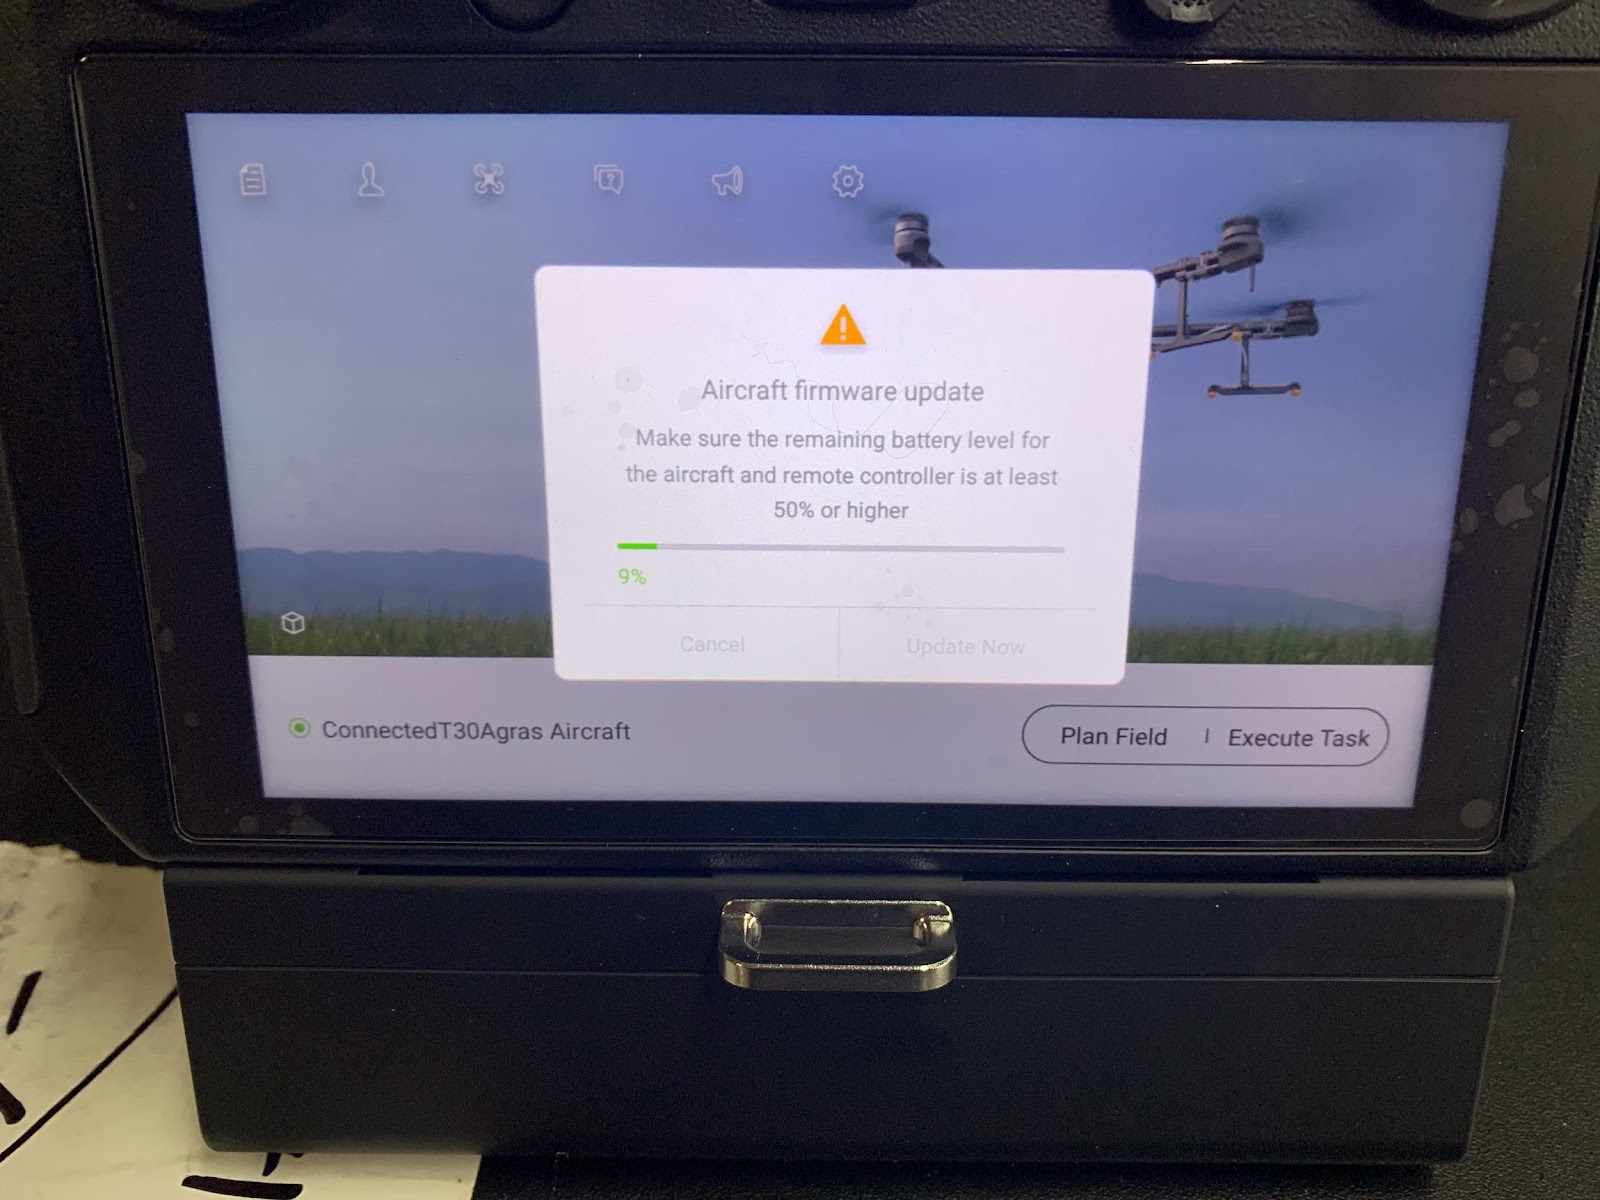
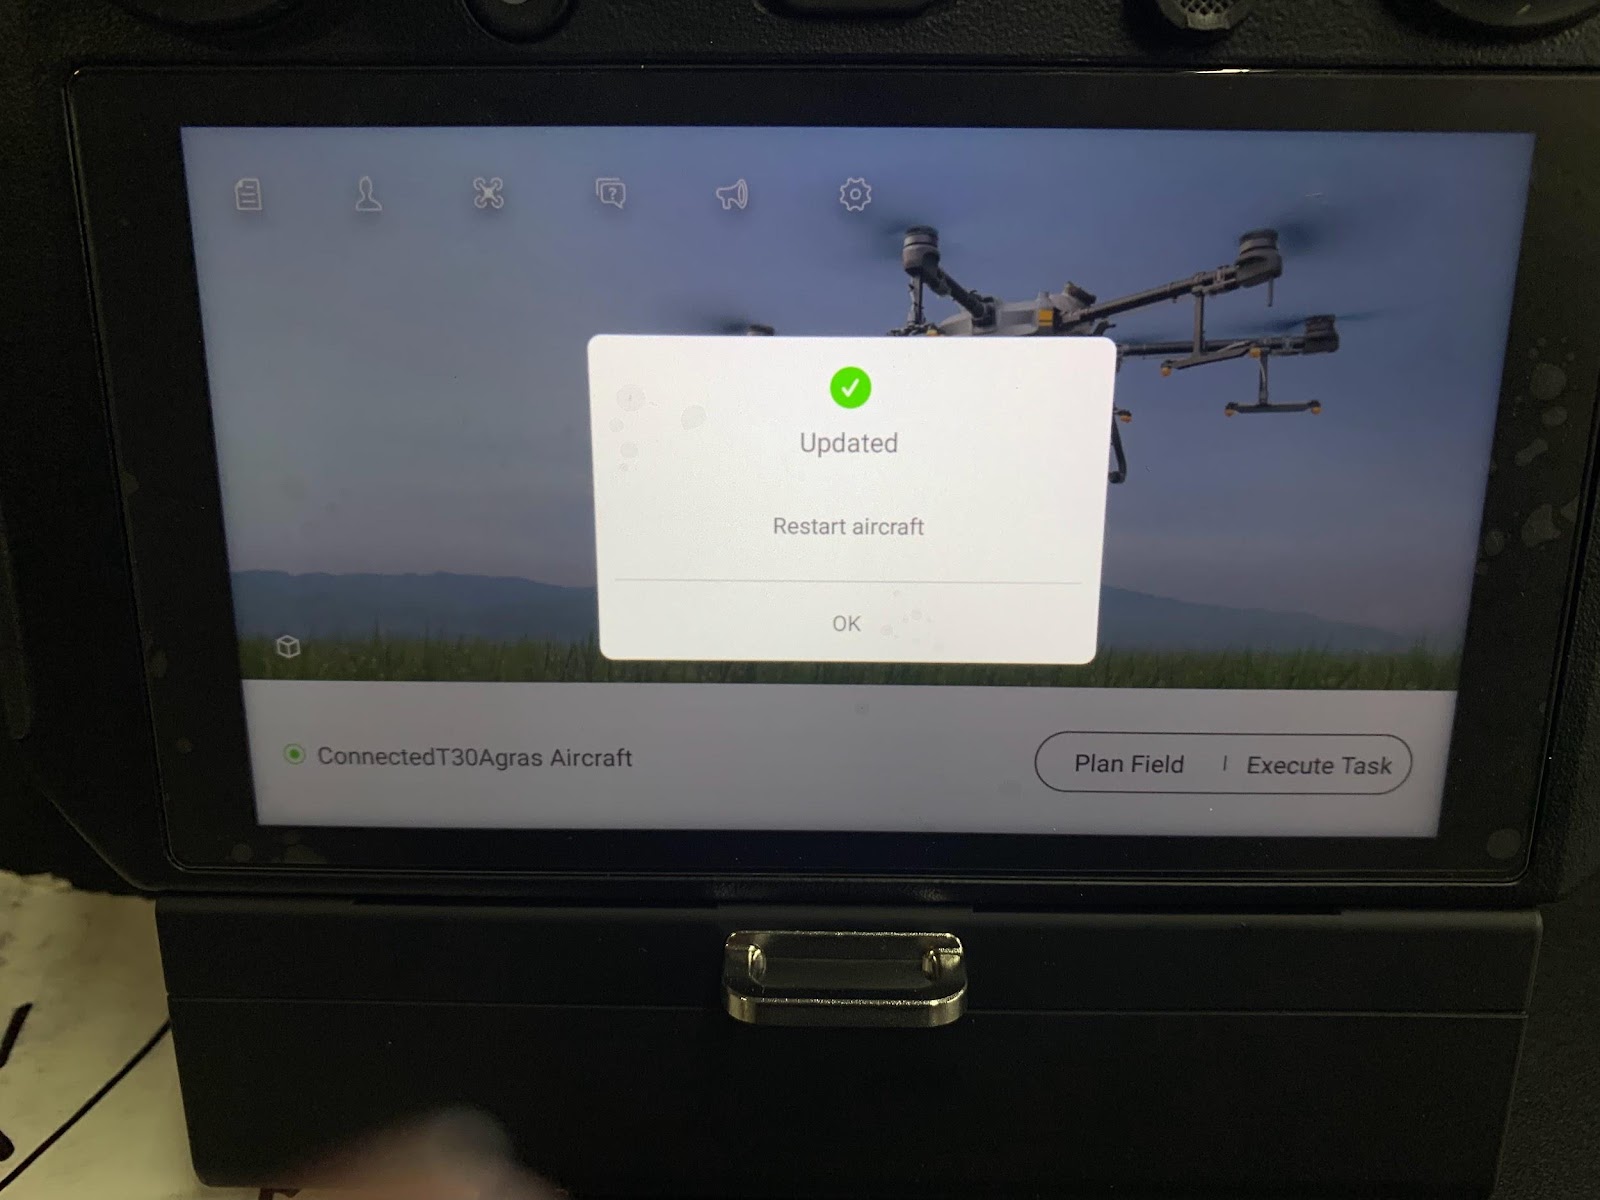
- Drone Firmware Update
- Select device management icon on home screen
- Drone should be selected
- If not, click the drop down arrow and click “Select” on the newest firmware version.
- Select “Update” at bottom of screen
- Allow the drone to update, it can take a while but usually less than 15 minutes
- Allow the drone to update, it can take a while but usually less than 15 minutes

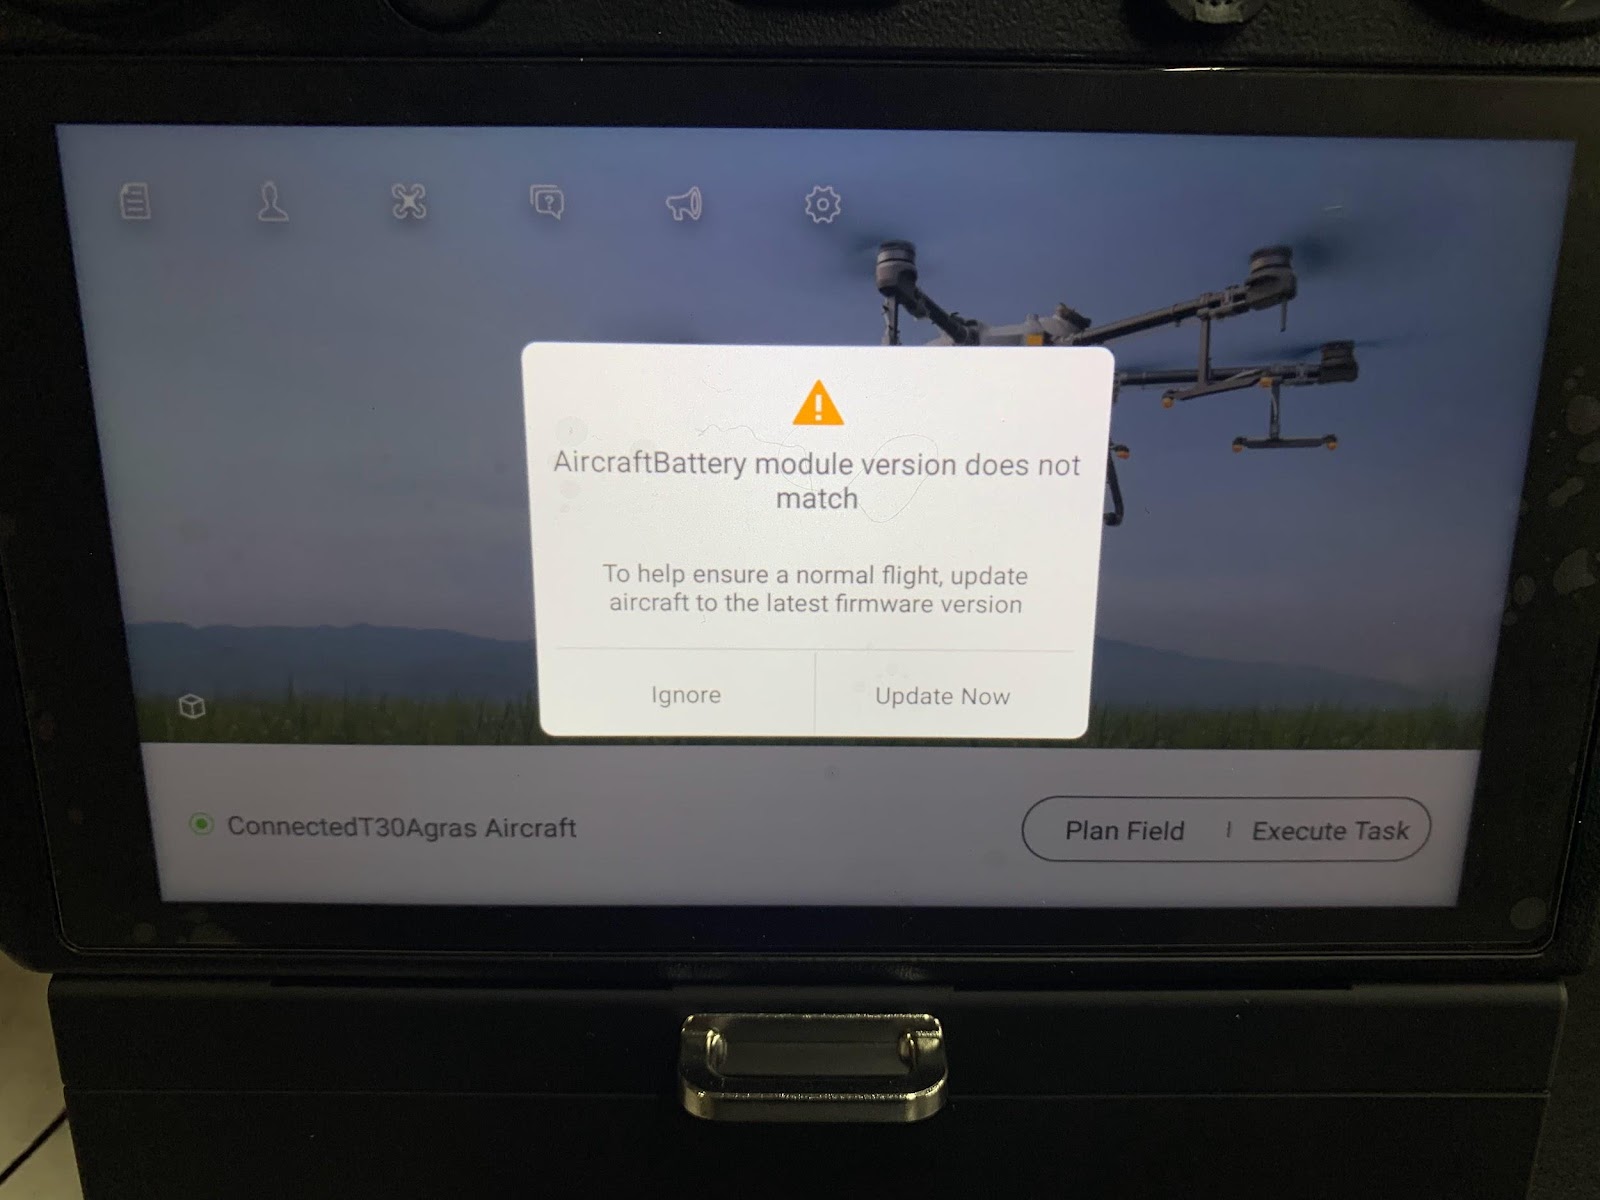
Drone Battery Update
- When the battery is first used, you may be asked to update the battery module version. Please update each battery during first use.
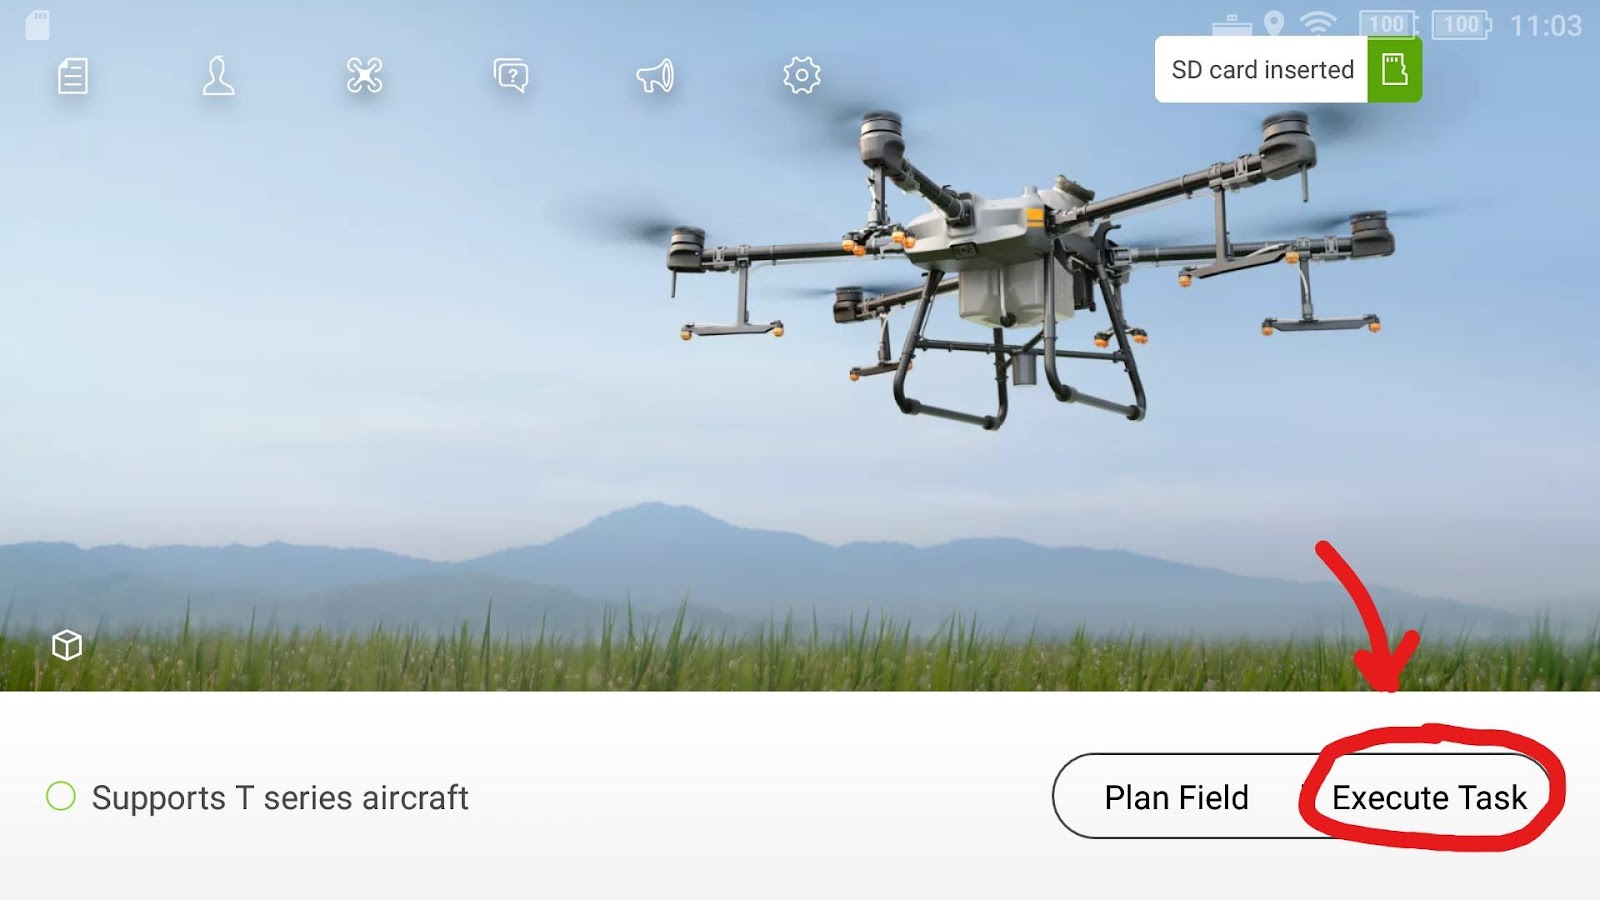
Turning Off RTK Positioning
- Select “Execute Task”
- Select “Settings” gear in top right
- Select “RTK”
- Turn off “RTK Positioning”

Your settings for RTK should look like the image above.
First Time Calibration For Spray System
- Install your choice of nozzle size.
- We recommend 02 yellow nozzles for 2 Gal/ac or higher rates.
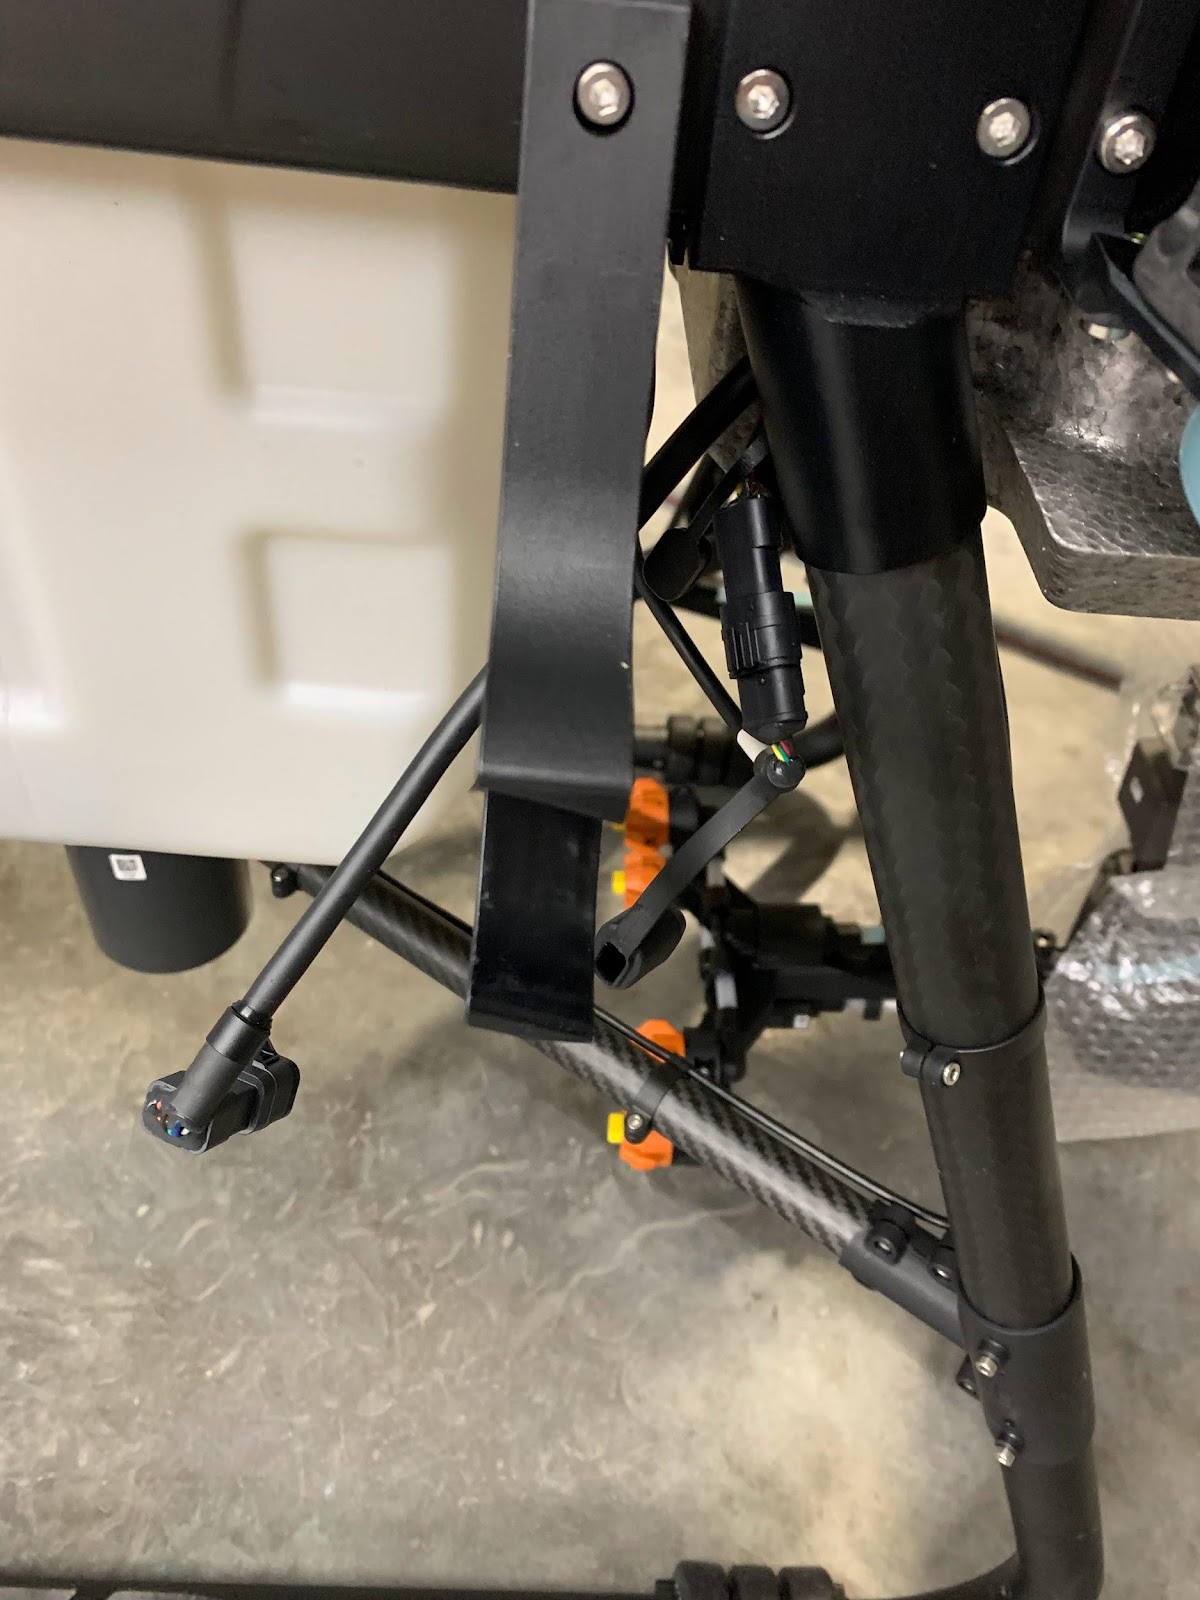
- (Image of nozzle components and assembly steps)
- Click Execute Task
- Lower Right corner of home screen
- Click Setting wheel
- top right corner

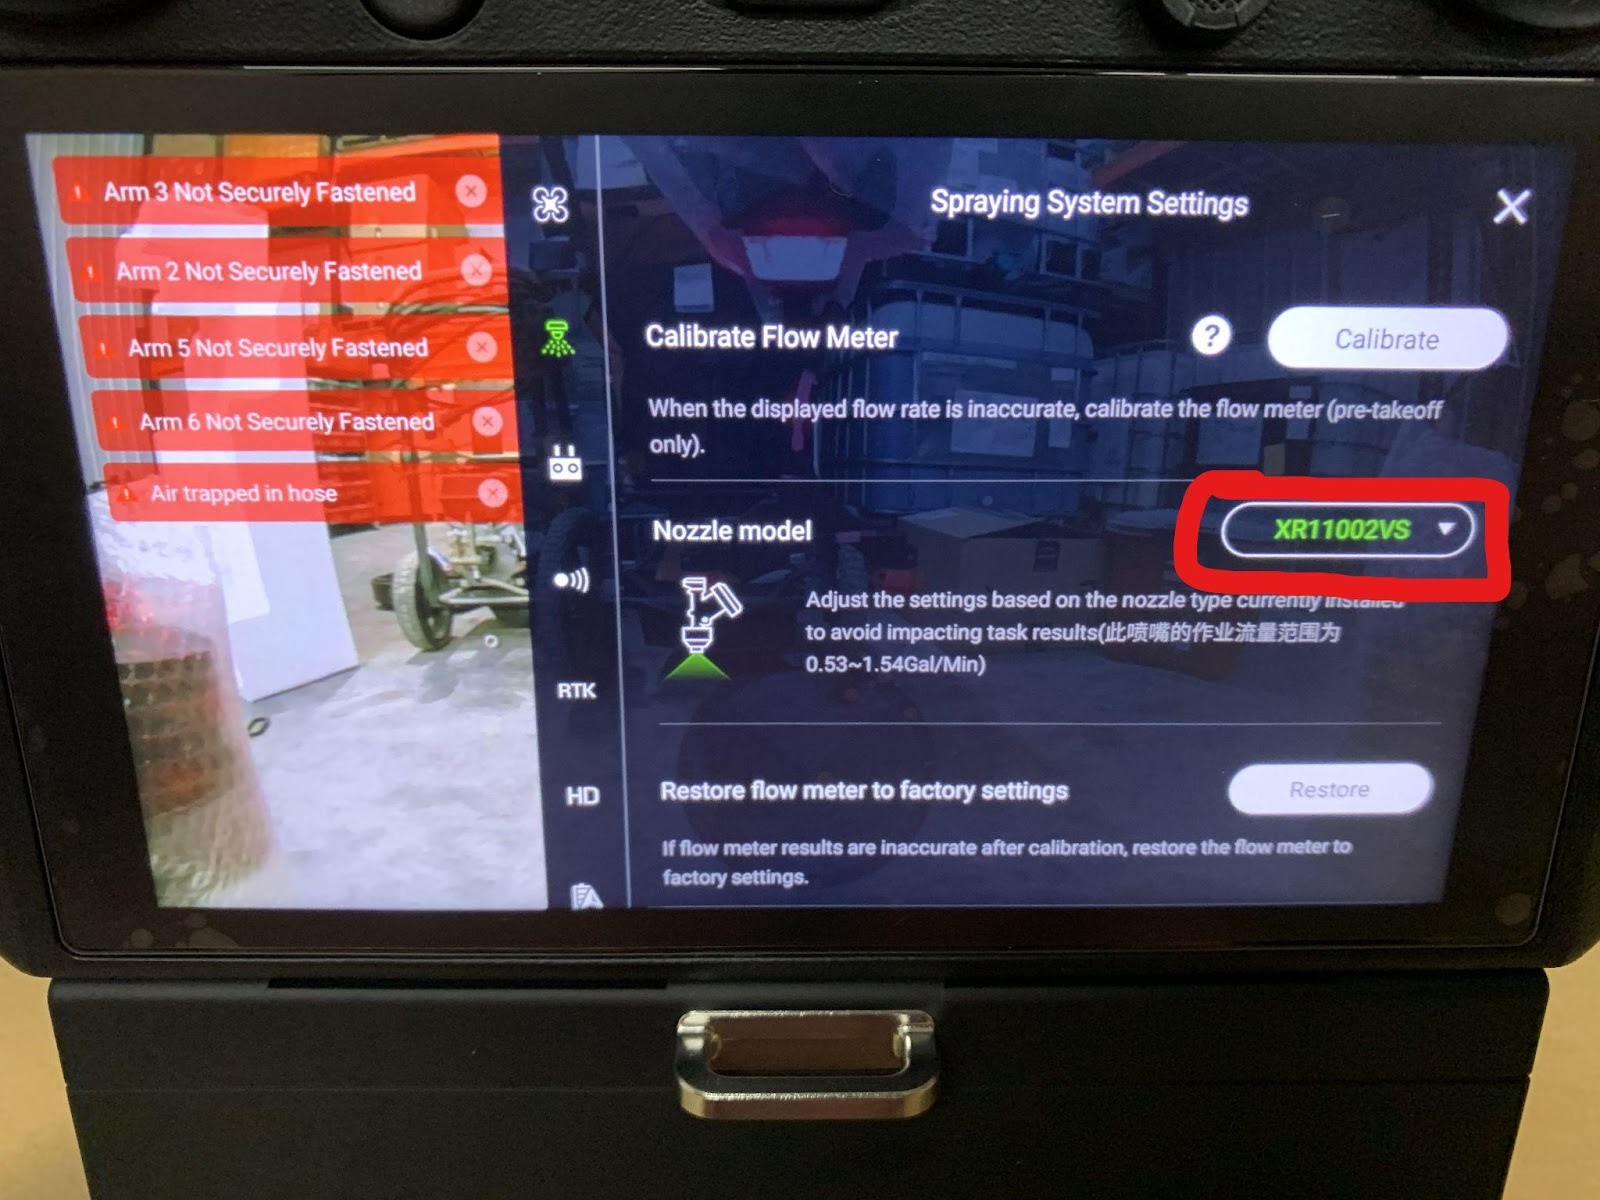
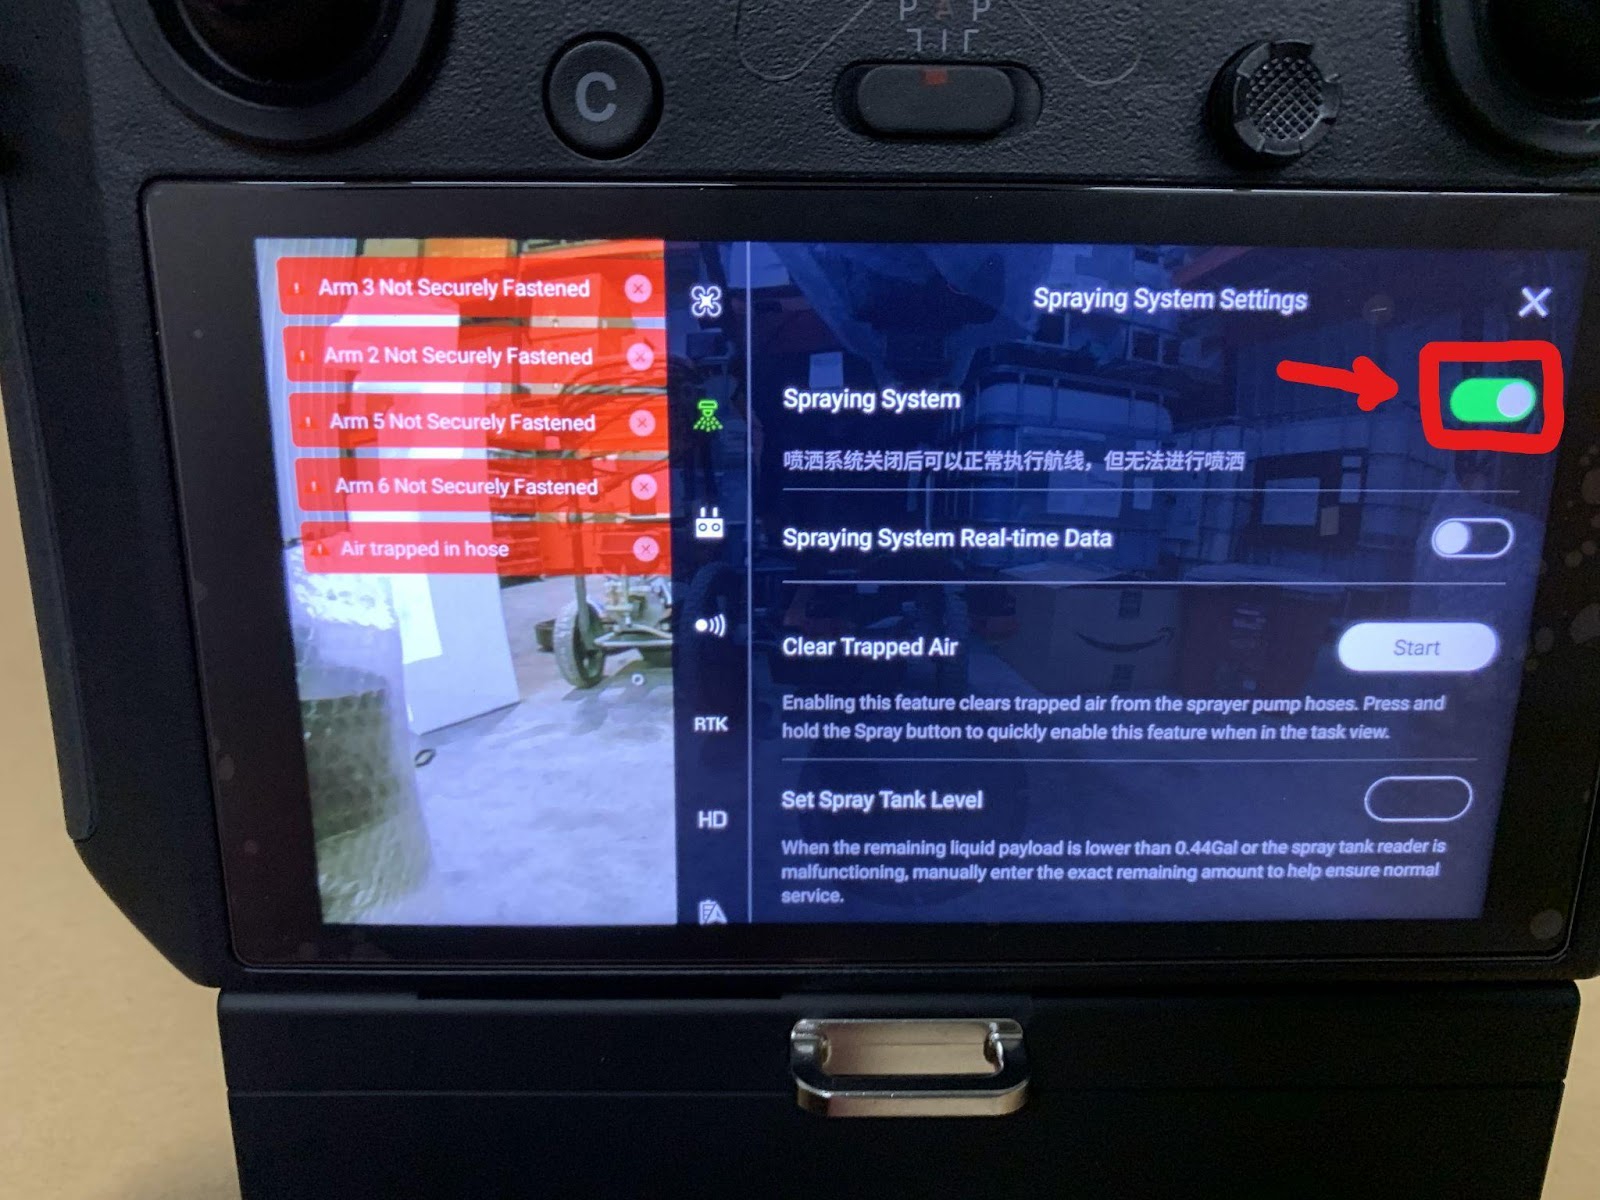
- Click Spray Icon (Spraying System Settings Menu)
- Under Nozzle Model
- Select your nozzle type

- Fill Sprayer Tank With water
- Press and hold Red Dot Button
- Left Index Finger button on top of controller
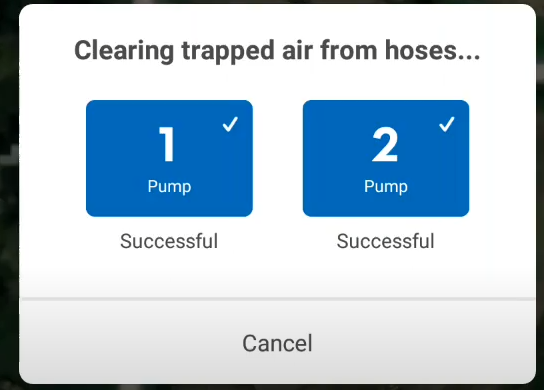
- Allow drone to clear trapped air in pumps
- Ensure all nozzles are spraying during this process.
- Once Trapped Air is cleared go back into spraying System Settings
- Select “Calibrate Flow Meter”
- The drone will reset the calibration factor of the flow meter.
- Wait until that process is complete
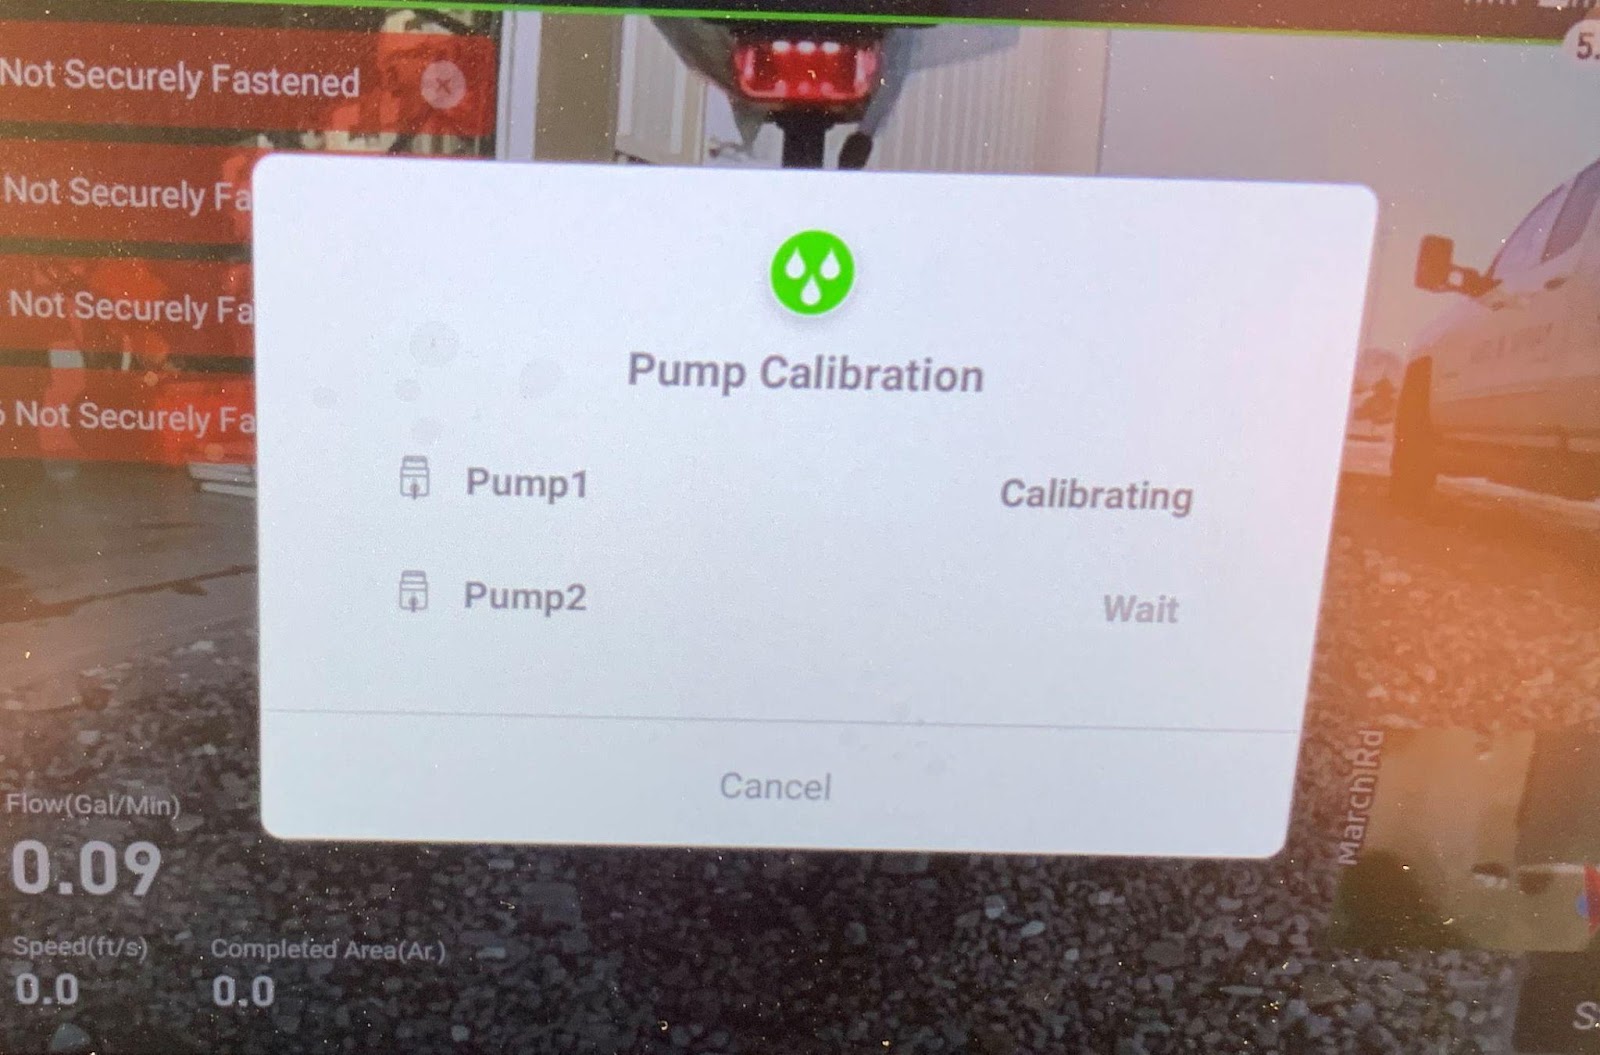
- Select “Calibrate Pump Flow”

- Select both pumps to calibrate

- Wait for calibration process to complete
- If a pump fails to calibrate, retry calibration process for the pump(s) that failed.

- Ensure “Spraying System” is checked on (Green tab)
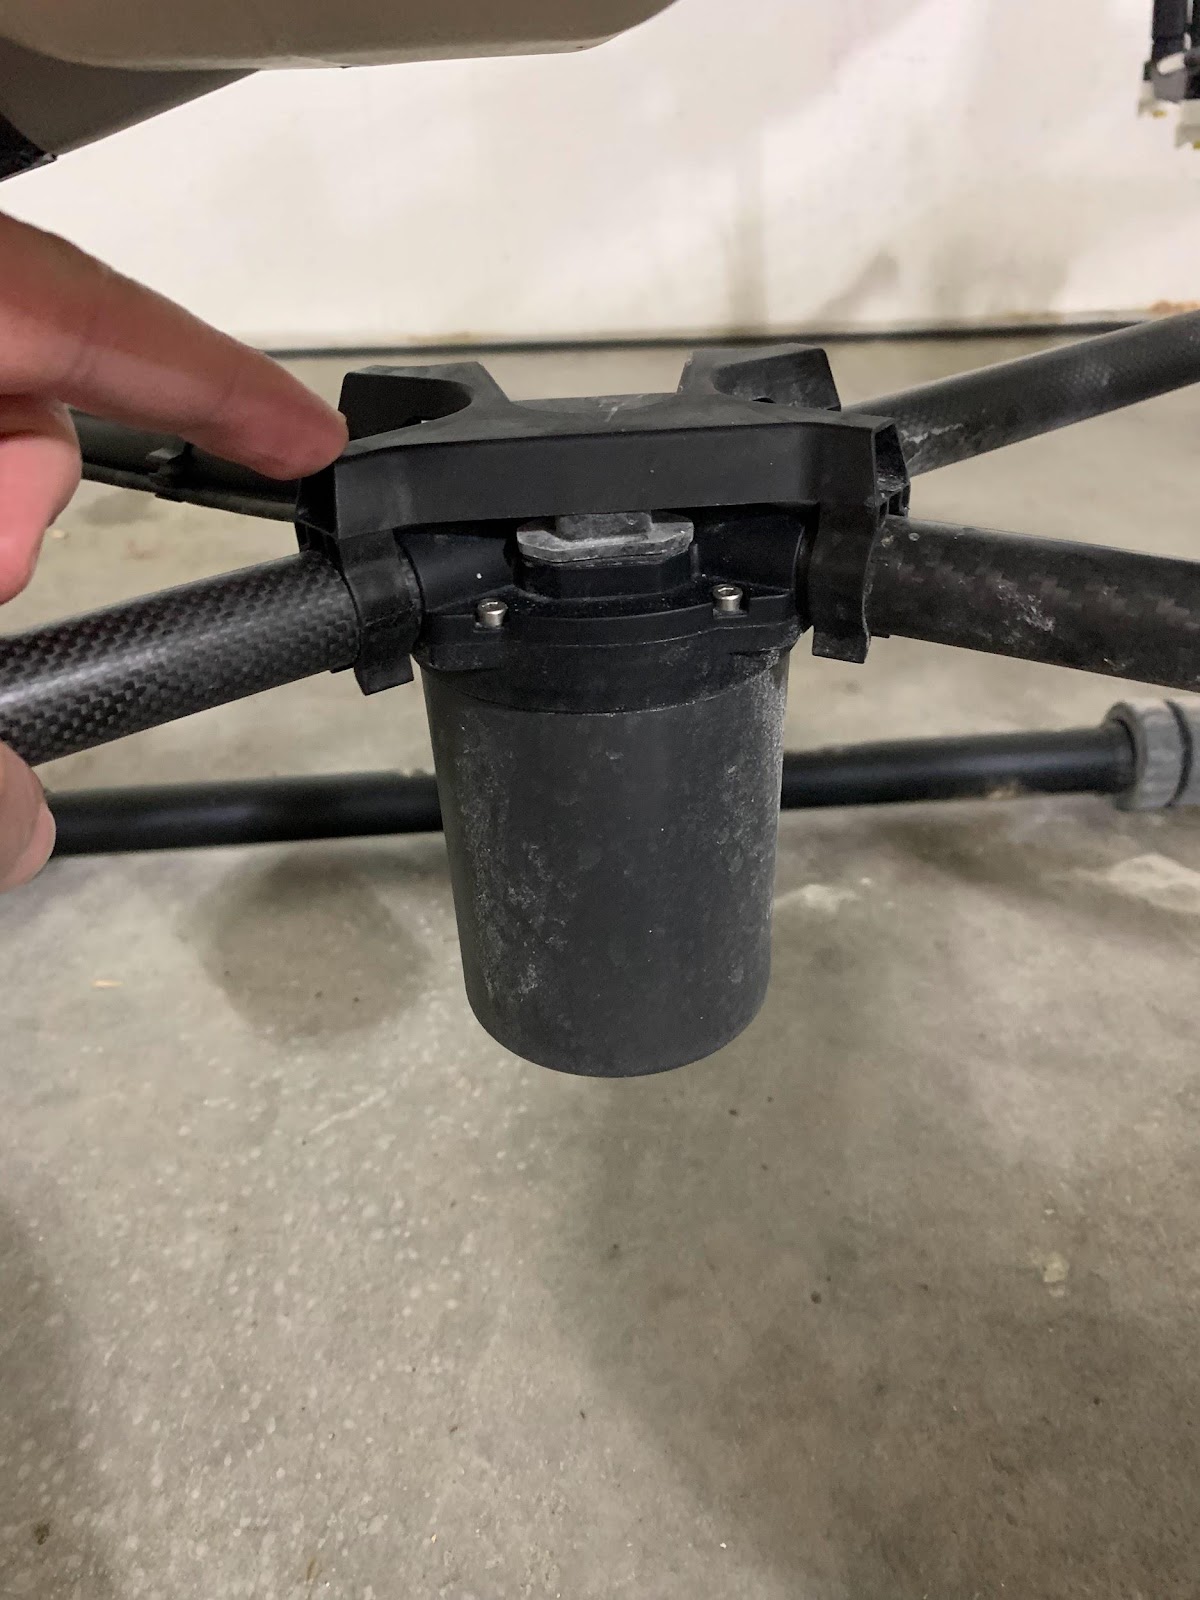
Drone Inspection
- Please inspect your drone upon unboxing to check for any damaged parts.
- Please let us know ASAP if anything is broken
- Perform a motor mount check
- Grasb sides of motor foam pads with both hands firmly and gently rotate left and right to make sure there is no play in the mount.
- Mount should not move
- Grasb sides of motor foam pads with both hands firmly and gently rotate left and right to make sure there is no play in the mount.
- Make sure battery connection pins are not bent
- Look over screws and ensure none look backed out or missing
- If you are missing the following please inform us.
- Spreader and or Spray tank extension plug
- Radar Cover Shield