![ASD_icon_4c.png]](https://knowledgebase.agrispraydrones.com/hs-fs/hubfs/ASD_icon_4c.png?width=50&height=50&name=ASD_icon_4c.png)
Important Note: You will need to perform a Tank Weight Calibration prior to your first Spreader Calibration.
Weigh the material actually dispensed during the calibrations and update the spreader weight box accordingly after each.
The Spreader Calibration is to ensure accurate material distribution during operation and is vital when spreading product.
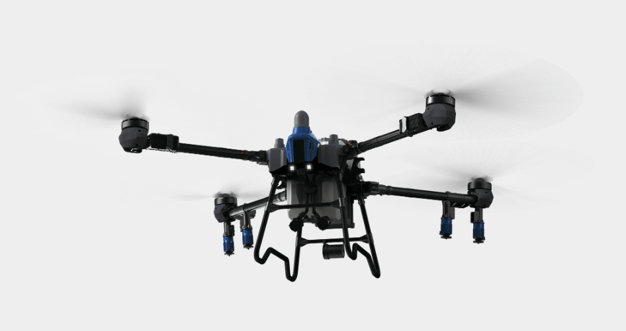
How to perform a Spreader calibration on the EAV J150
1. Gather tools and prepare the spreader 0:01
- You only need a pair of pliers for this process.
- Before calibrating, remove the spinner disc underneath the spreader.
- Pull out the locking pin and set it aside.
- Hold the spinner disc with one hand and spin the bottom locking piece to the left to remove it.
- Keep all removed parts together, and do not lose the pin—it prevents the spinner disc from coming off during operation.
2. Set up for calibration and empty the material 1:00
- Place a trash can underneath the spreader because calibration will empty material out.
- If needed, raise the drone using a pallet jack, tractor, or forklift so you can access the underside.
- Make sure you have enough material in the hopper before starting, since the calibration will dispense material during the test.
3. Open the spreader calibration screen 1:29
- From the home screen, go to the flight screen.
- Tap Auto.
- Open the settings in the top-right corner.
- Select Spreader.
- If this is the first time installing the spreader, complete a tank weight calibration while empty first.
- In this example, the tank weight has already been calibrated and the current weight is showing correctly.
4. Create or select a calibration template 1:50
- Add a template for the material you are calibrating.
- Name it something recognizable, like "test".
- Choose the material type based on what you are spreading.
- You can create different templates for different:
- Seeds
- Densities
- Seed sizes
5. Run the minimum flow rate calibration 2:28
- Set the calibration time to 50 seconds.
- Turn the auger speed all the way down to minimum.
- Press Start Calibration.
- Watch for material to begin flowing and for the progress bar to move across the screen.
- Make sure the hopper does not run out of material during the test, or the calibration will not complete properly.
6. Weigh the material dispensed during the minimum test 3:19
- After the calibration finishes, collect the dispensed material.
- Use a secondary scale to weigh it.
- Tare the scale first before weighing.
- Enter the measured amount into the spreader calibration screen.
- Review the displayed values:
- Starting weight
- Remaining weight
- Weight spread
- Tap Next to continue.
7. Reload material and run the maximum flow rate calibration 3:49
- Reload the material you just weighed so the spreader is ready for the next test.
- This step often works best with two people.
- Set the calibration time to the lowest value.
- Set the material amount to 300.
- Run the maximum spreader flow rate calibration.
- Again, make sure the tank does not run out during the test.
- You may need to repeat this process for different material densities or seed sizes.
8. Weigh the material from the maximum test and save the template 4:51
- After the maximum calibration finishes, weigh the dispensed material on a secondary scale.
- Tare the scale before weighing.
- Enter the measured weight into the calibration screen.
- Once complete, the system will show the minimum and maximum spreader flow rates.
- Tap Save or Finish to store the template under the name you chose.
- If needed, you can:
- Adjust ratios for fine-tuning
- Delete a failed template
- Recalibrate if the process did not complete correctly
9. Get help if needed 5:51
- The calibration is now complete.
- If you have questions, contact Agrispray Drones through their website or support channels.
Cautionary Notes
-
Ensure that there is sufficient material in the spreader during both calibrations to avoid incomplete calibration.
Tips for Efficiency
-
Consider having a second person assist during the calibration process for better efficiency.
-
Experiment with different densities and seed sizes to find the optimal settings for your specific needs.
Product Link
Click Here for a J150 Spreader System
Additional Article
Click Here for J150 Tank weight calibration article
Stay Informed: Subscribe to the Agri Spray Drones Newsletter
How to Subscribe
Subscribing is easy and takes less than a minute:
-
Visit Our Website
Go to www.agrispraydrones.com -
Scroll to the Bottom of the Homepage
Look for the “Subscribe to Our Newsletter” section. -
Enter Your Email Address
Type in the email address where you'd like to receive updates. -
Click “Subscribe”
Once you submit, you’ll be added to our mailing list and will start receiving valuable updates straight to your inbox.
Don’t Miss Out
Join thousands of ag professionals who trust Agri Spray Drones for the latest in drone spraying and precision ag.
Subscribe today — and let us help you take your operation to the next level.