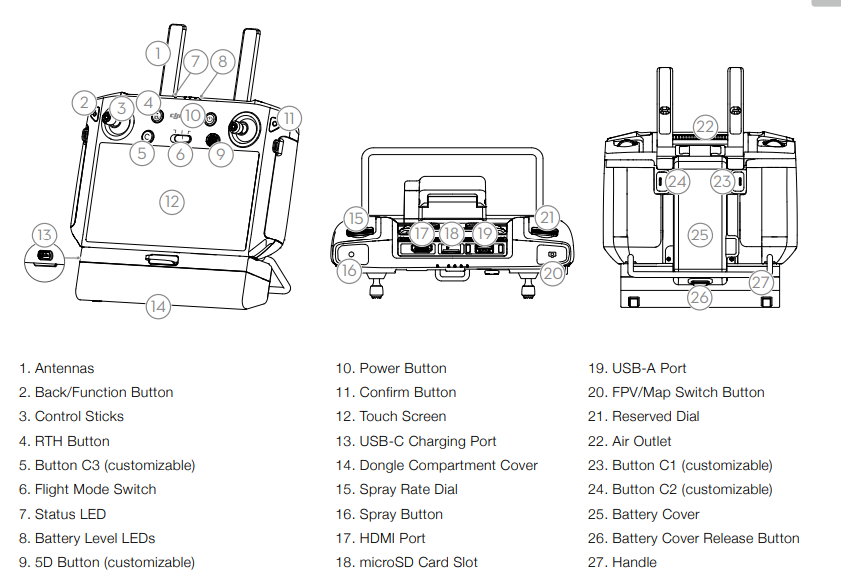
Controller Familiarization
How to power on your controller
- Press and release, then press and hold the power button on your controller.
- Pressing and releasing will show battery level on LED on top of controller
- Pressing and holding while LEDs are on will power on the controller
- Use same method to power off the controller
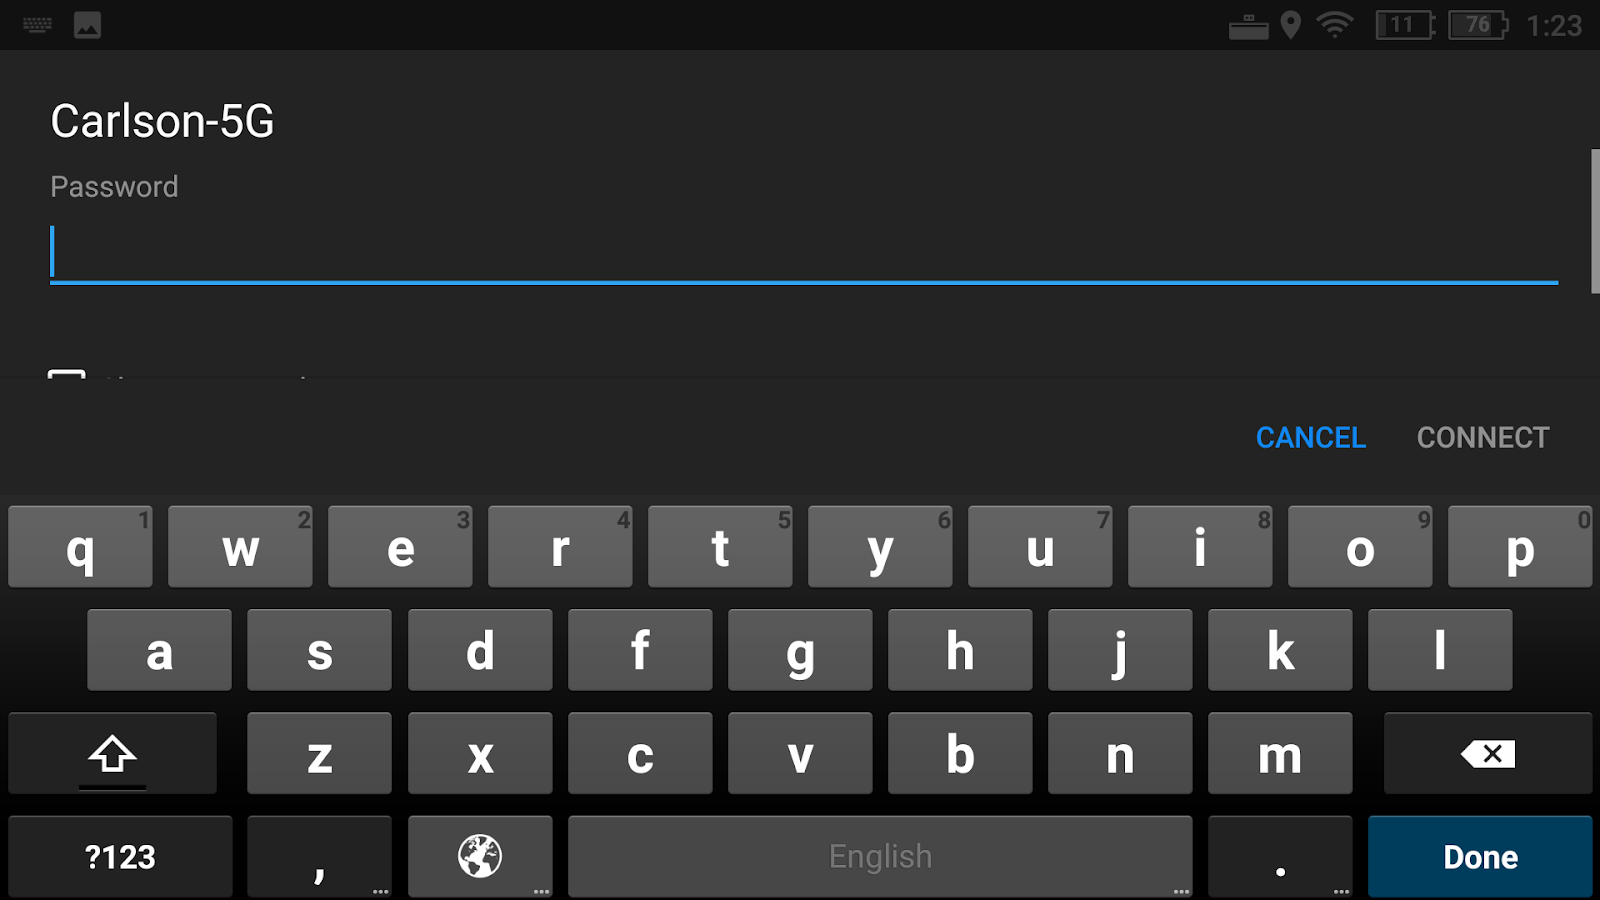
Connecting to Wifi
- Pull down from top of screen to open controller options
- Click settings wheel
- Click Wifi
- Click settings wheel

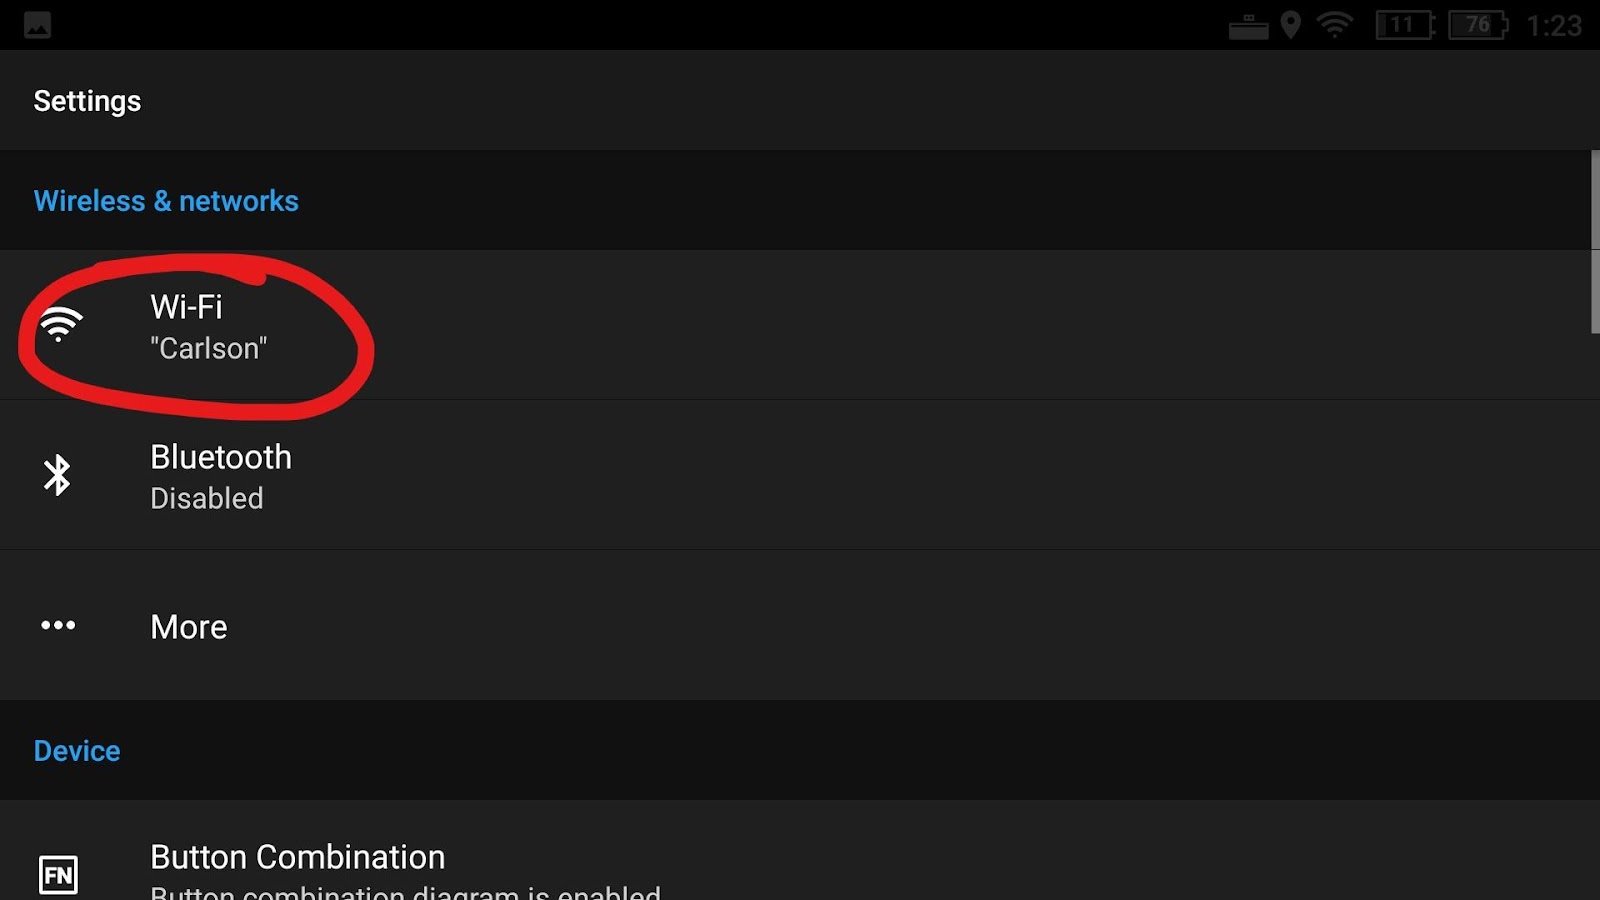
- Select your wifi
- Enter your wifi password
- A internet connection will allow you to log into your dji account
- Upload/download missions
- Apply updates to your dji devices
- Load your satellite imagery for field planning (route creation)
- Also save image one control cache for field operation
Home Screen Icons

- Field Management - access saved fields, upload, download created fields to your cloud
- Profile/Account - Login or out of account, information on flight records
- Device Management - device information and you do updates here
- Troubleshooting Guide Page - provides steps to troubleshoot issues, refer to this to solve problems, if unable please contact us and we can assist you.
- Notifications - drone errors will display here
- General Settings - change things like language, region, storage preferences
- Battery Level (Internal/External)
- Current Local Time
General Settings
- On home screen click “Settings wheel”
- General Settings will open
- Units of Measurement
- We recommend using “Metric”
- This will give you more options for application rates later during spraying operations
- We recommend using “Metric”
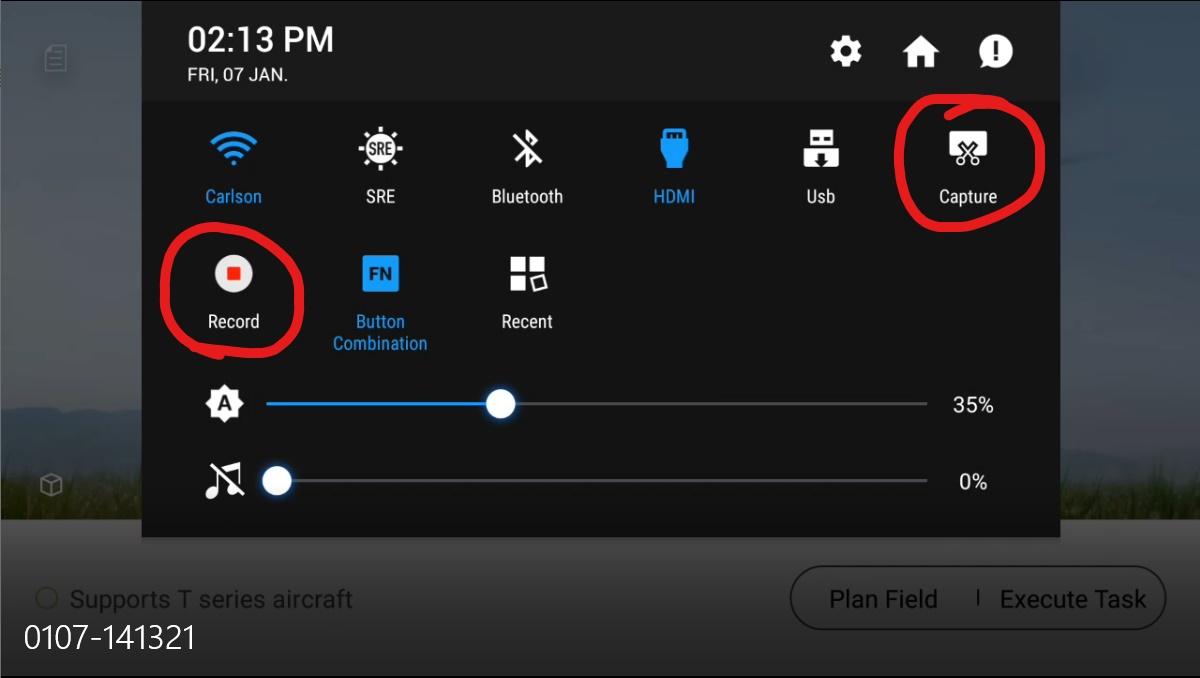
Controller Brightness and Volume Settings
- Pull down from top of screen
- You can use the sliders to adjust Volume and screen brightness
- We recommend using a bluetooth headset during operations so you can maintain awareness of what the drone is doing while generators are running.
- By clicking on the brightness icon next to the slider you can enable auto brightness mode
- By clicking on the volume icon you can mute or unmute the volume
- You can use the sliders to adjust Volume and screen brightness
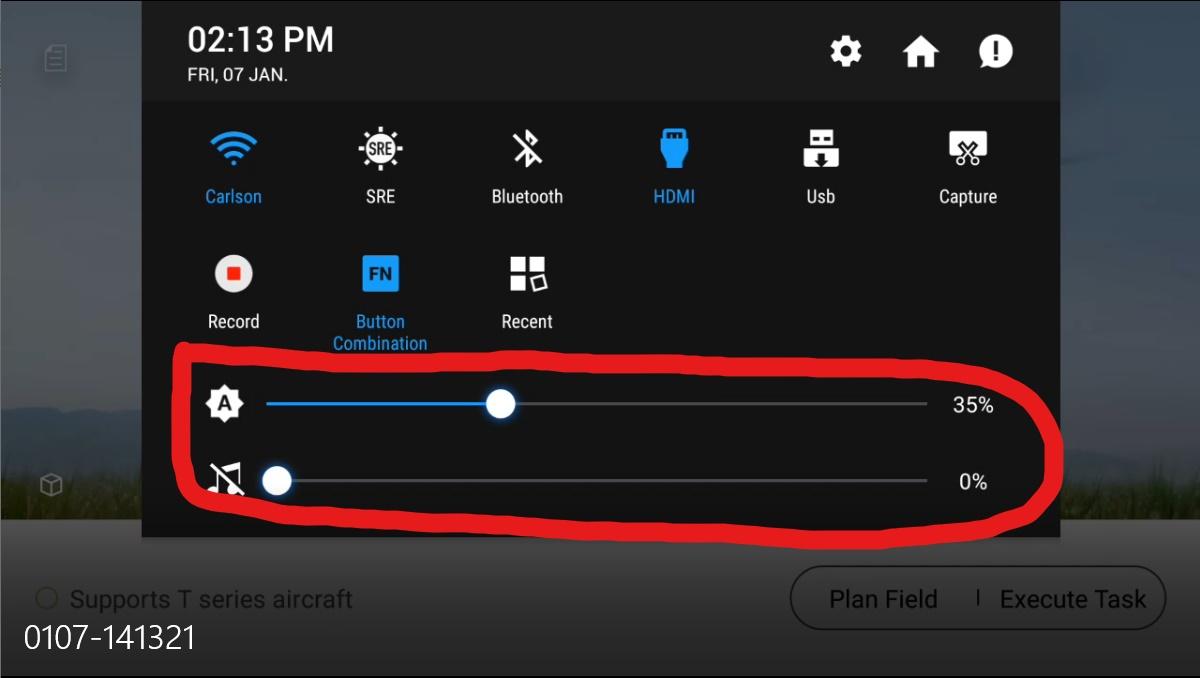
- You can also take screenshots and screen record by clicking “capture” or “Record”.
Charging and Batteries For Controller
- The controller contains both an External and an Internal battery
- Recommended to have both fully charged before starting an operation
- Extra controller battery in the field ops kit must be plugged into the charger before first use.
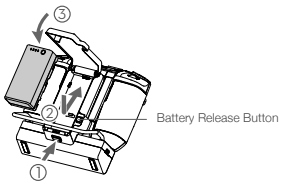
- To remove external battery
- Open cover by pressing the bottom button (image 1)
- Remove battery by pressing side button and sliding battery down (Image 2)
- Then remove from compartment
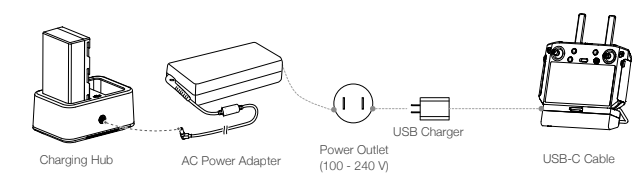
- To Charge batteries
- Plug battery into charging station
- When battery is fully charger LED indication will be solid green
- If two batteries are plugged into station, one will fully charge than station will start charging second battery automatically
- Use USB cable and plug into left side of the base of controller to charge internal battery
- Internal battery is fully charged when all controller LEDS are lit and Indication light is solid green
- Plug battery into charging station
Stay Informed: Subscribe to the Agri Spray Drones Newsletter
How to Subscribe Stay Informed: Subscribe to the Agri Spray Drones Newsletter
Subscribing is easy and takes less than a minute:
-
Visit Our Website
Go to www.agrispraydrones.com -
Scroll to the Bottom of the Homepage
Look for the “Subscribe to Our Newsletter” section. -
Enter Your Email Address
Type in the email address where you'd like to receive updates. -
Click “Subscribe”
Once you submit, you’ll be added to our mailing list and will start receiving valuable updates straight to your inbox.Don’t Miss Out
Join thousands of ag professionals who trust Agri Spray Drones for the latest in drone spraying and precision ag.
Subscribe today — and let us help you take your operation to the next level.